Fleet Management
Designed to support both internal and external stakeholders, our tools empower Charging Point Operators (CPOs) to simplify administration, streamline billing, and enhance operational efficiency.
EOSVOLT’s backend platform lets fleet managers:
- Multi-Level Data Linking
Link charging keys, vehicles, and driver profiles to ensure accurate data management. - Internal vs. External User Segmentation
Organize and manage data by separating your internal fleets from those of external clients. - Create Fleet Teams & Member Discount Groups
Set up customized user groups and giving each group its own pricing, charging privileges, and payment rules. - Flexible Pricing Configuration
Apply specific rates to each fleet or member group based on strategic models and agreements. - Location-Based Access Control
Allow designated teams or users to charge at selected stations. - Secure control
Assign role-based access levels within your team to maintain security and prevent unauthorized changes.
Before we look at the step-by-step details of each feature in the EOSVOLT Fleet Management module, it’s important to understand the concept of fleet assets and the different types of fleet teams. This will help you get a clearer idea of how the module works as a whole.
FLEET ASSETS
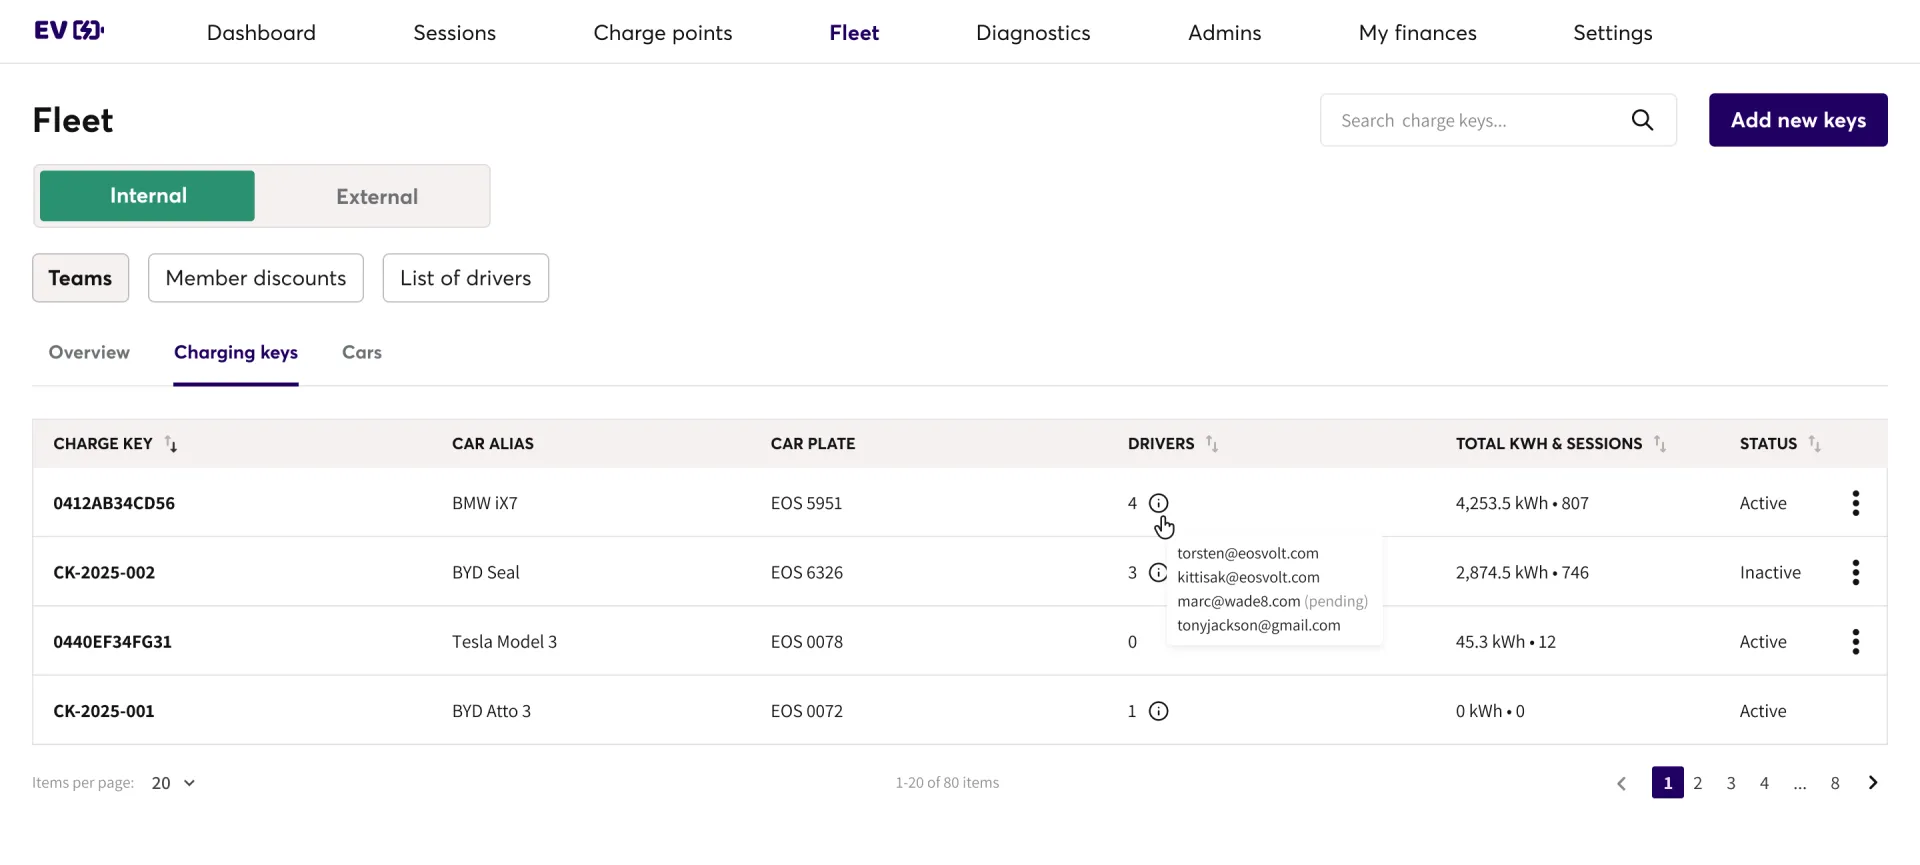
The key purpose of this module is to help CPOs collect usage data from EVs in their fleet to support their business and optimize operations. To achieve this, the module lets CPOs add charge keys and assign them to cars and drivers, enabling them to gain detailed usage insights—for example, the amount of kWh charged per car or driver, the number of sessions, and more.
Charge Keys
The fundamental unit for collecting charging data. Each charging session is recorded against a charge key, making it essential for tracking overall usage.
Cars
Represents a specific vehicle in the fleet. By linking a charge key to a car, you can monitor energy consumption and charging behavior at the vehicle level.
Drivers
Represents the person operating the vehicle. Assigning charge keys to drivers allows you to analyze usage by individual drivers.
FLEET TEAM & MEMBER DISCOUNT
Once you’ve added charge keys and assigned them to drivers and cars, you can stop there if you want. This will be sufficient to collect usage data.
HOWEVER, you can also take it a step further by grouping them into teams. This allows you to set different charging rates and conditions for each fleet team, enabling you to manage their fleet in a more sophisticated way.
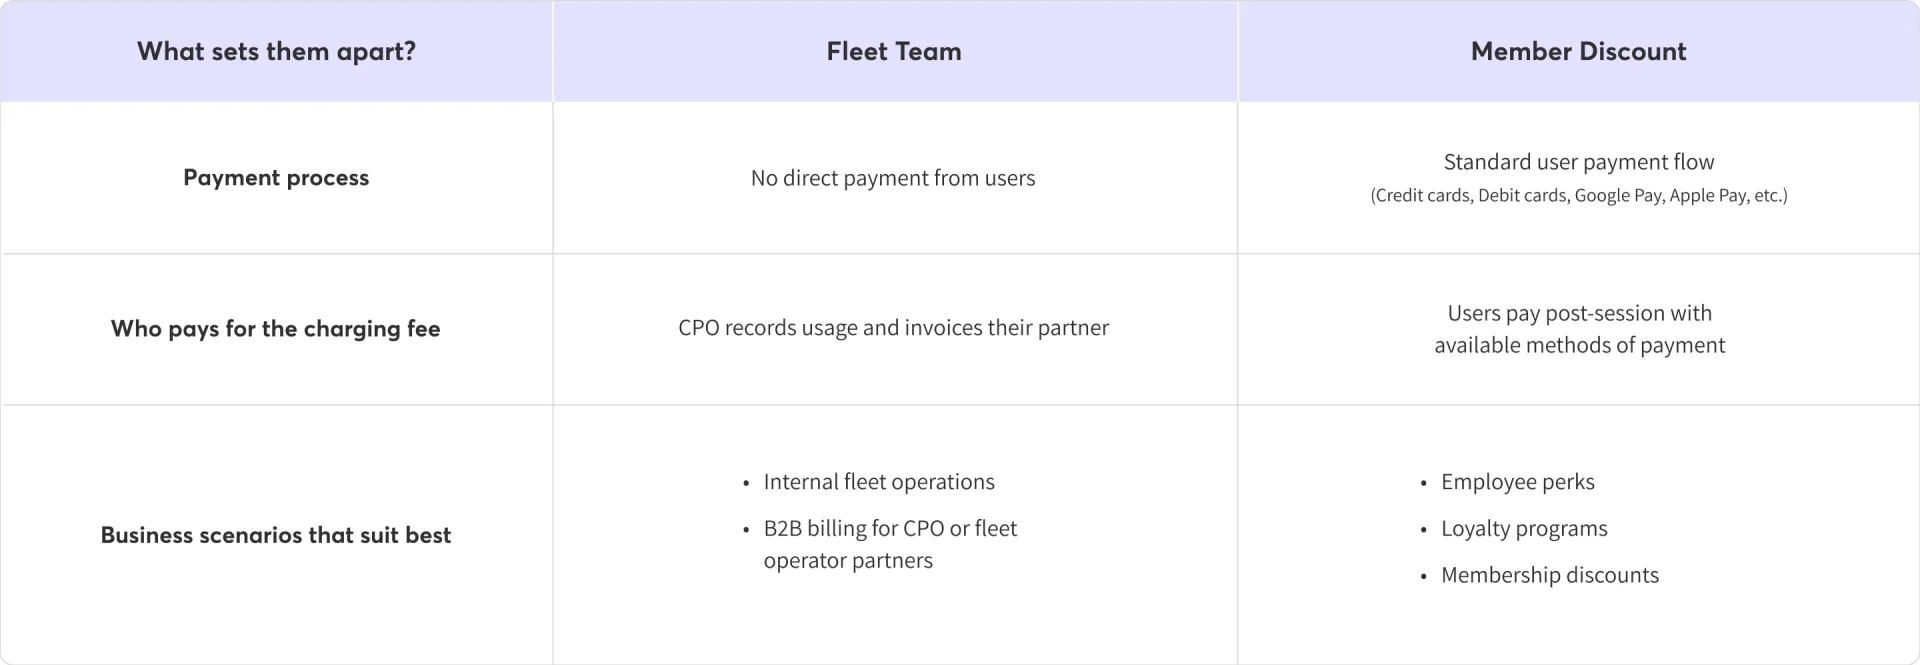
There are two types of fleet groups: Fleet Team and Member Discount. Here are the differences:
Now that you understand how this module works, let’s look at how you can use each feature step by step.
KEY FEATURES
Adding a charge key
Adding a car
Adding a driver
Creating a Fleet Team
Creating a Member Discount
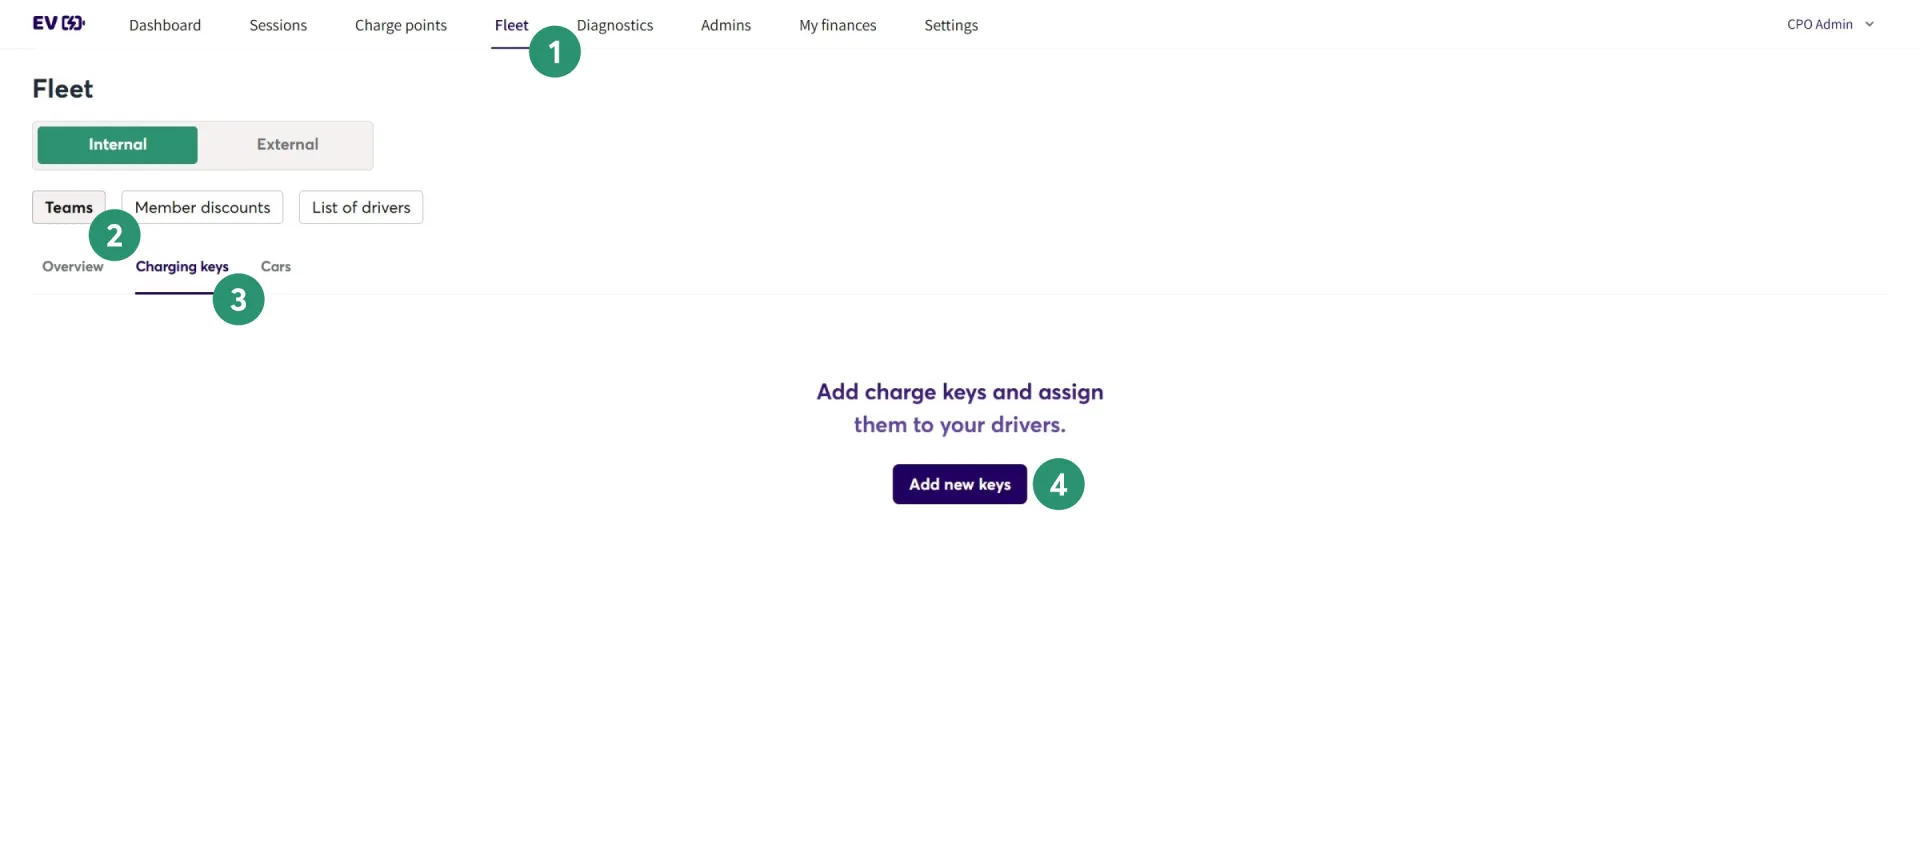
- On the top navigation bar, click "Fleet"
- Select "Teams"
- Select "Charging keys"
- Click "Add new keys"
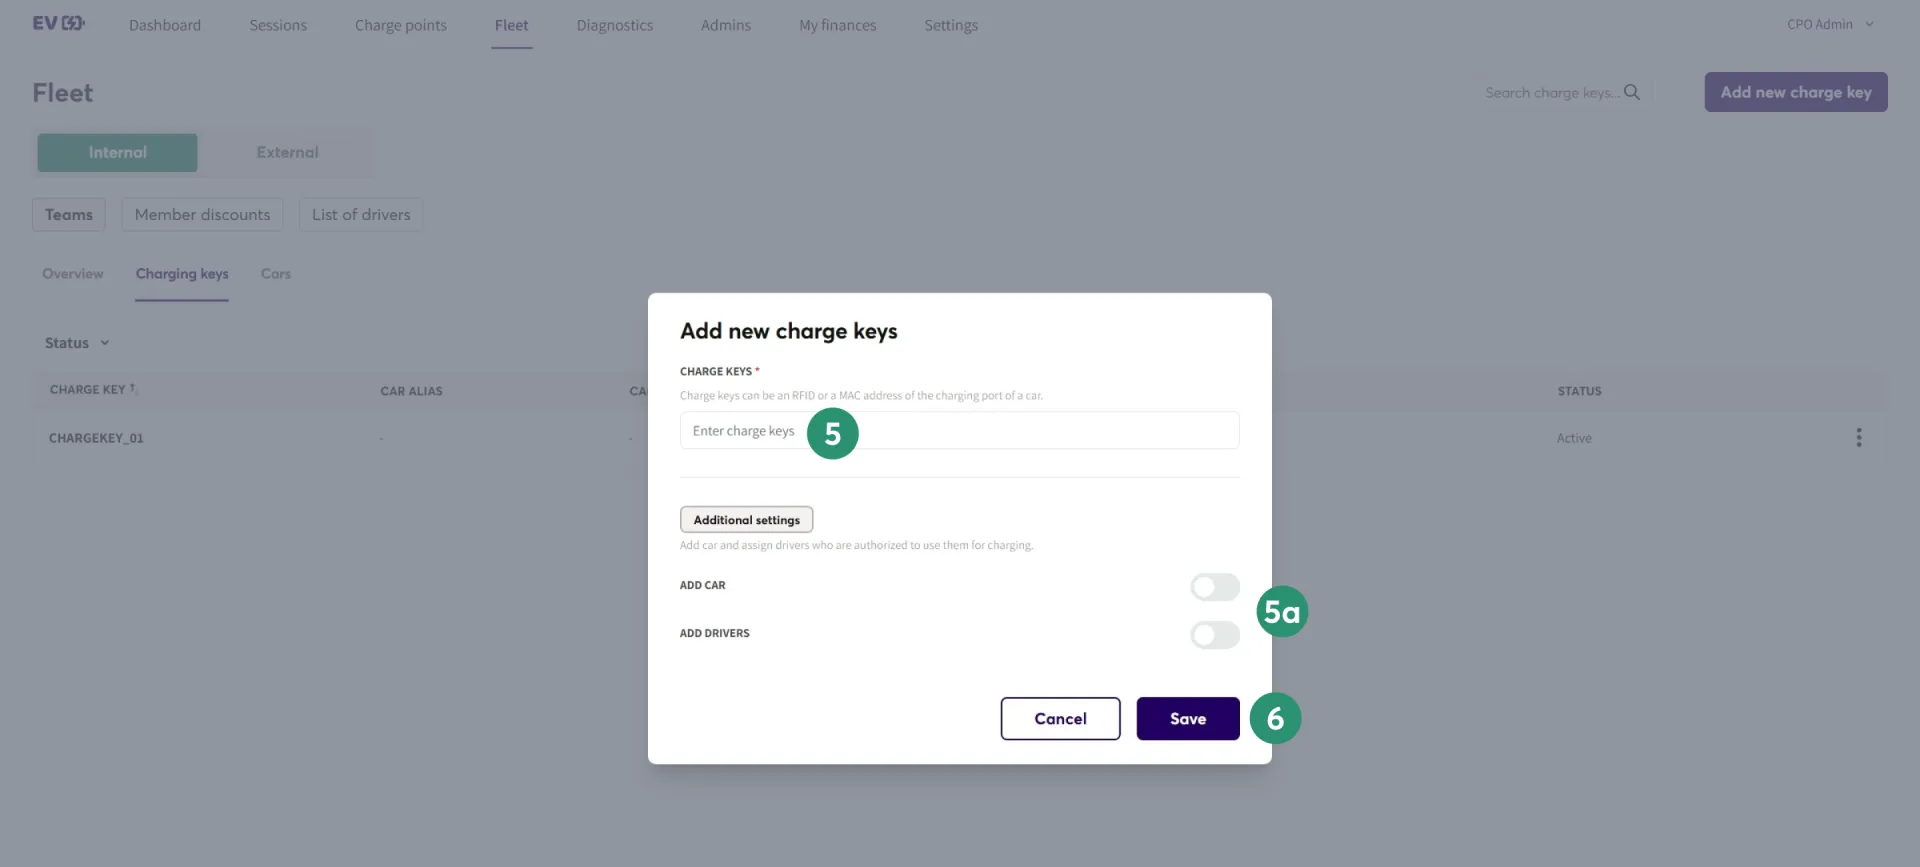
- Input the charge key information. This can be an RFID card code or the vehicle's MAC address.
- During this step, if the vehicles or drivers have already been created, you can turn on the toggle and select the relevant drivers or cars.
- Click "Save"
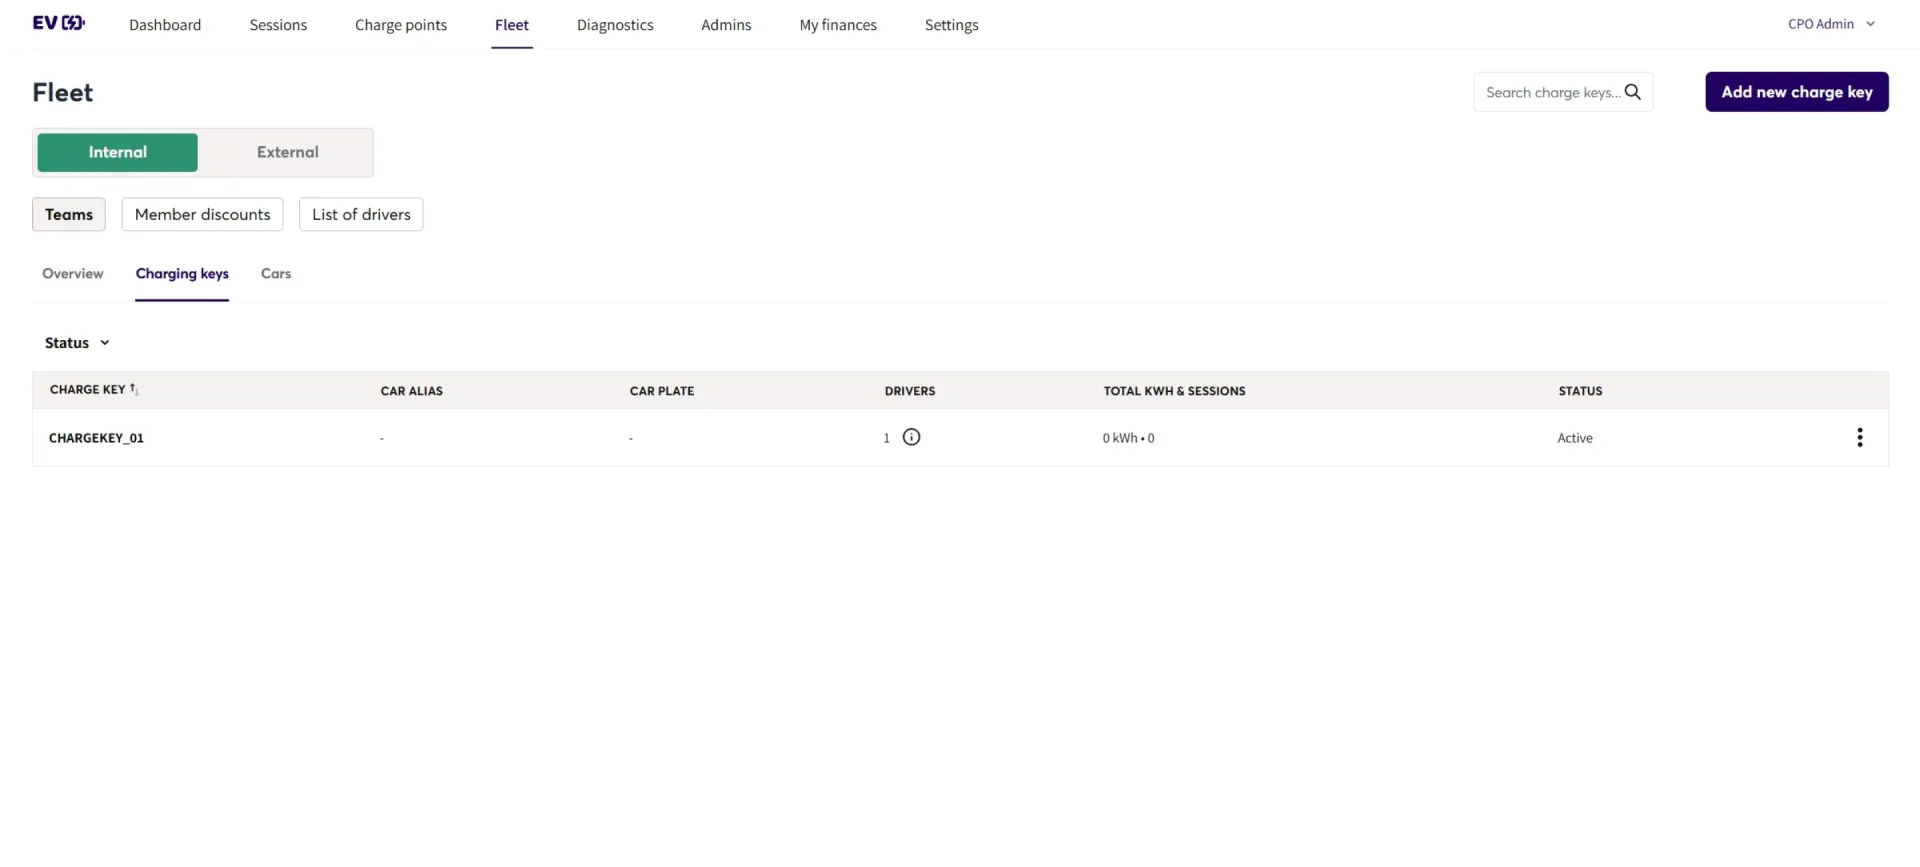
After saving, the charge key will be visible on this page.
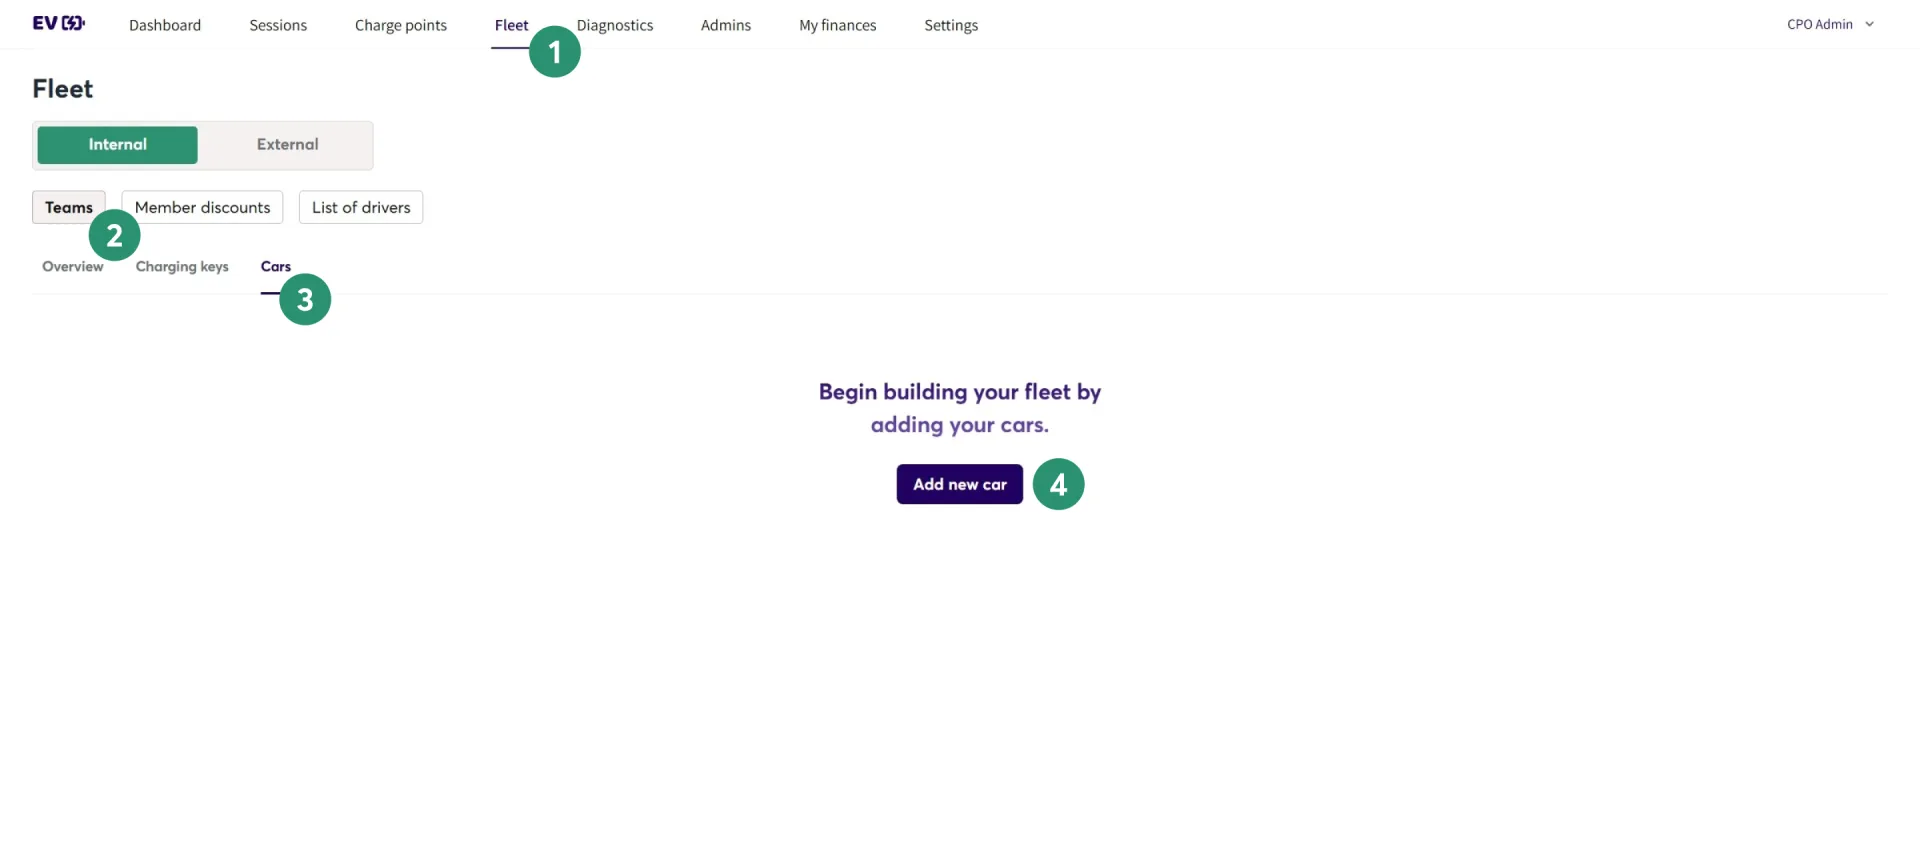
- On the top navigation bar, click "Fleet"
- Select "Teams"
- Select "Cars"
- Click "Add new car"
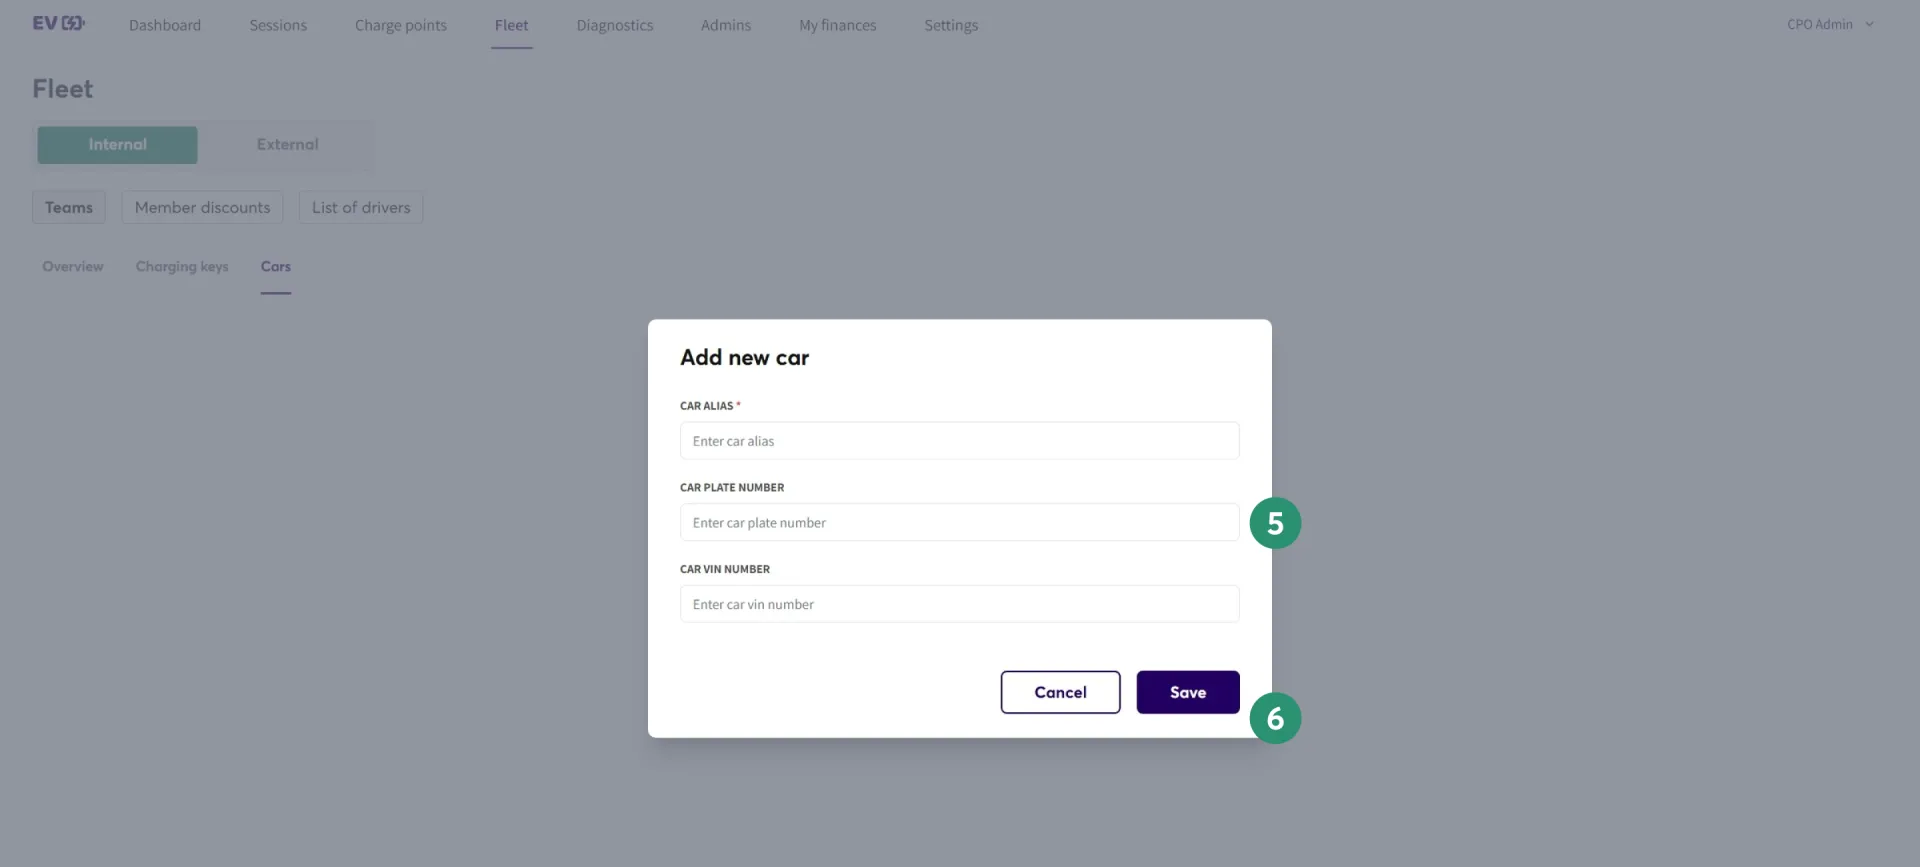
- Input the vehicle information in the provided fields.
- Click "Save"

After saving, the vehicle will be visible on this page.
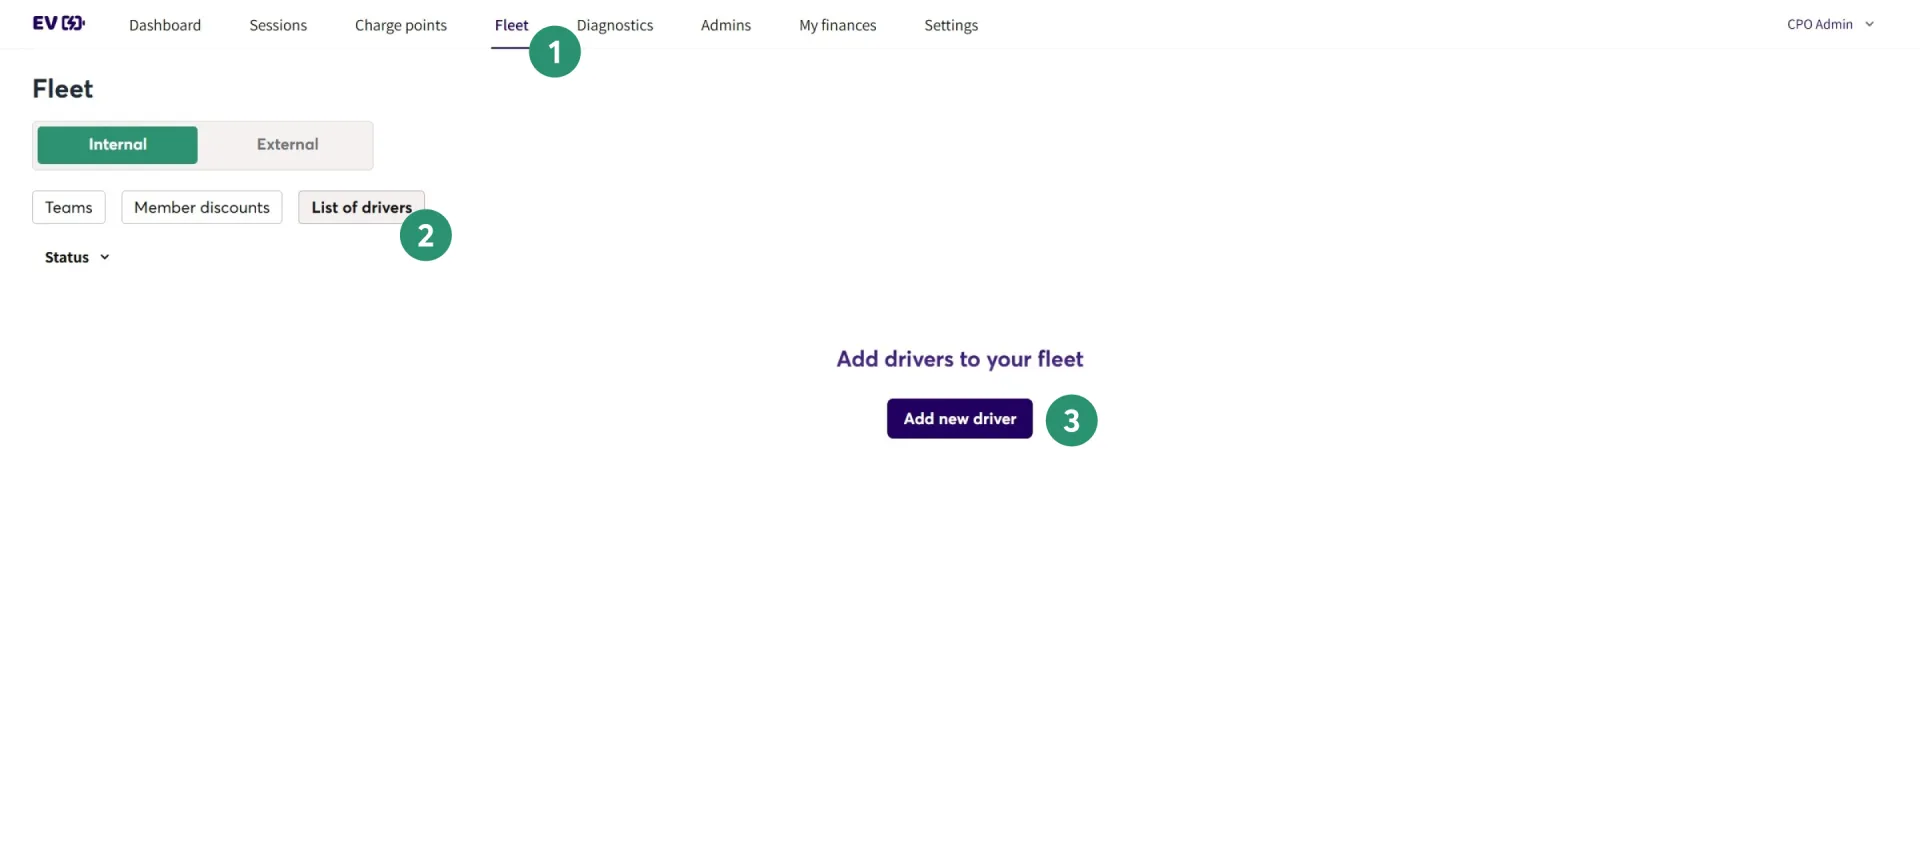
- On the top navigation bar, click "Fleet"
- Select "List of Drivers"
- Click "Add new driver"
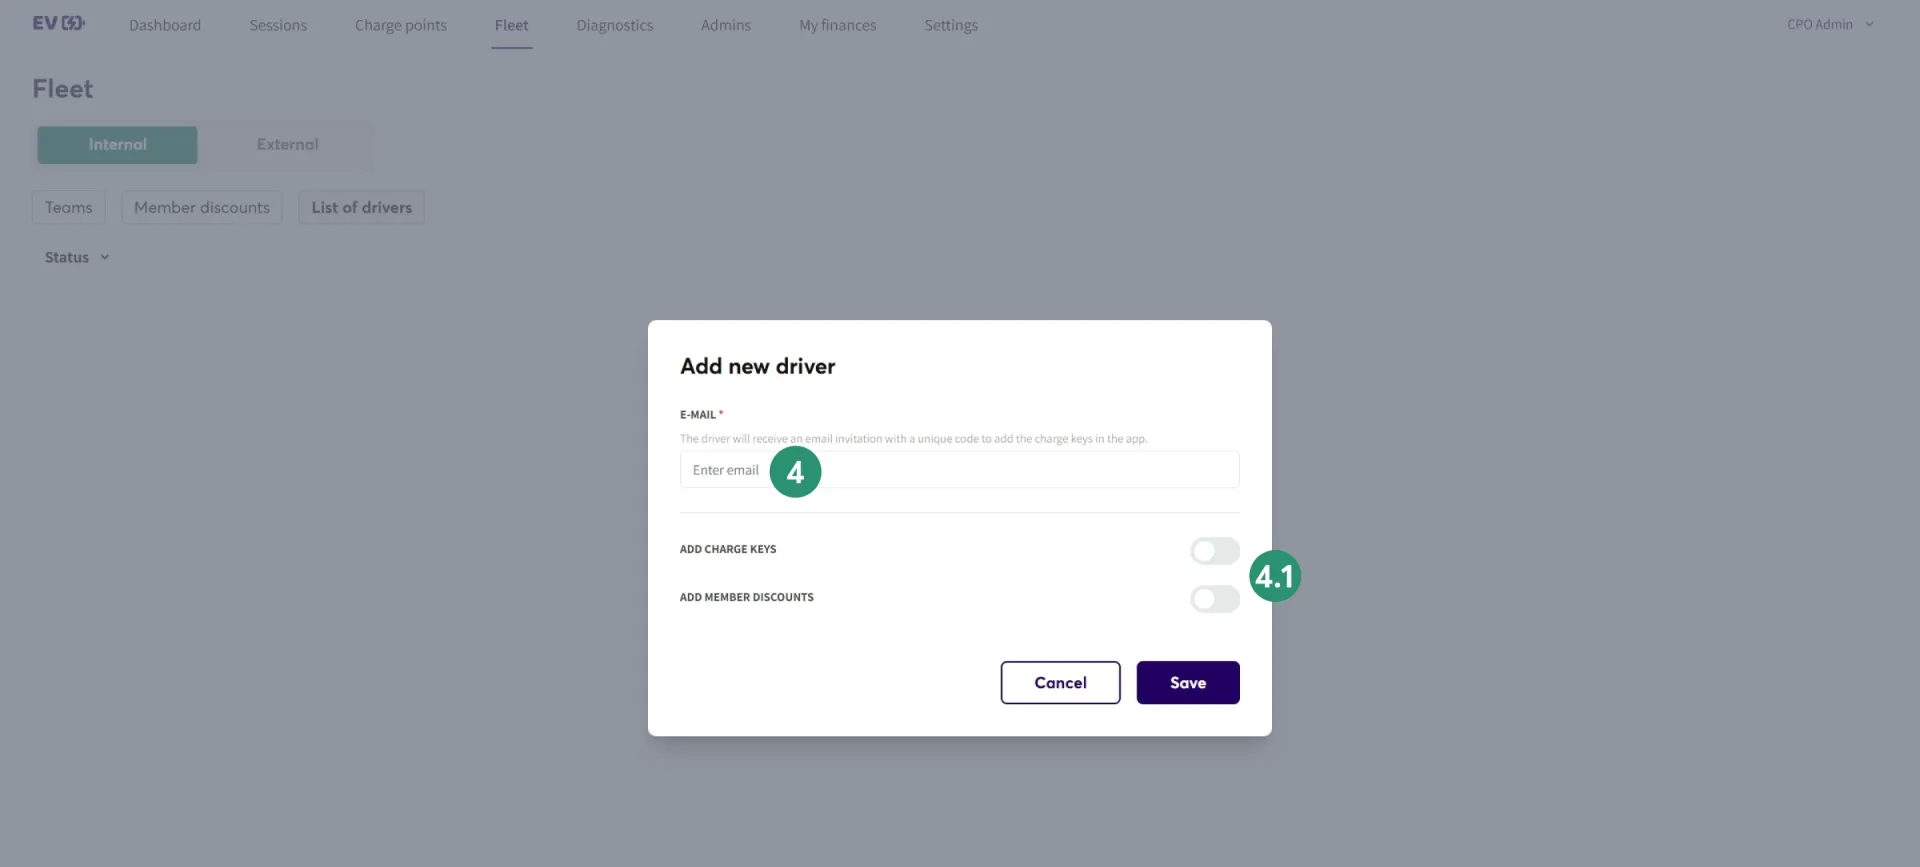
- Enter the driver's email in the provided field.
- If you have already created charge key or member discount, you can turn on the toggle and select the charge key and member discount respectively.
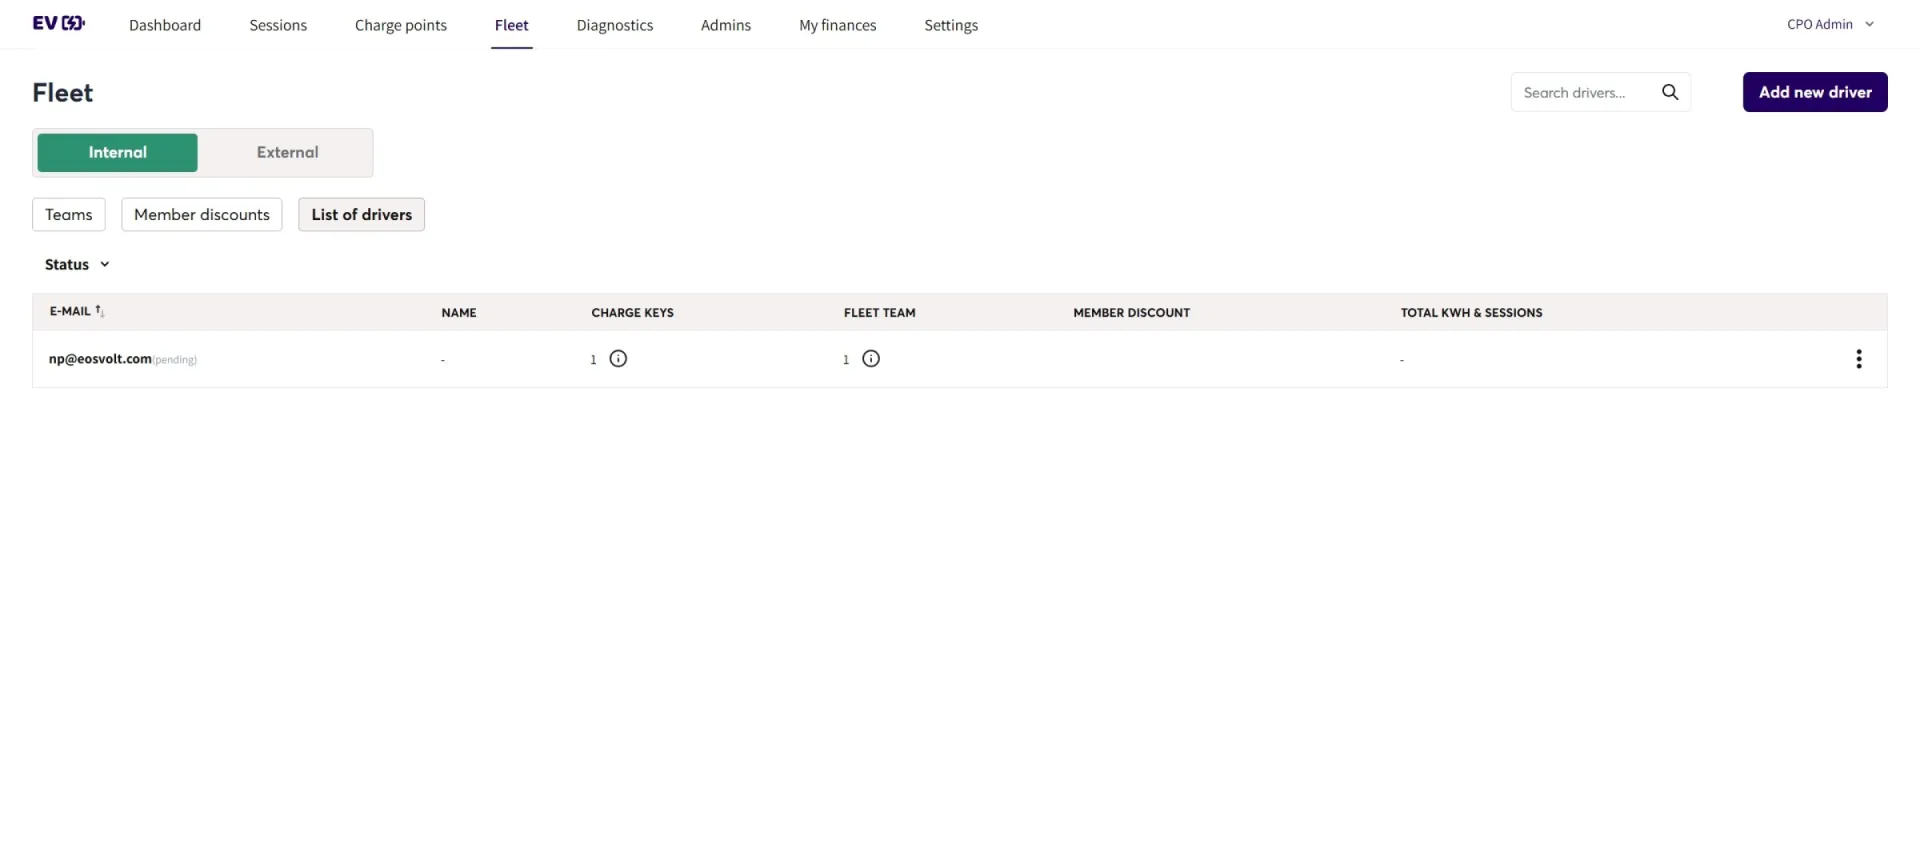
After saving, the driver will be visible on this page.
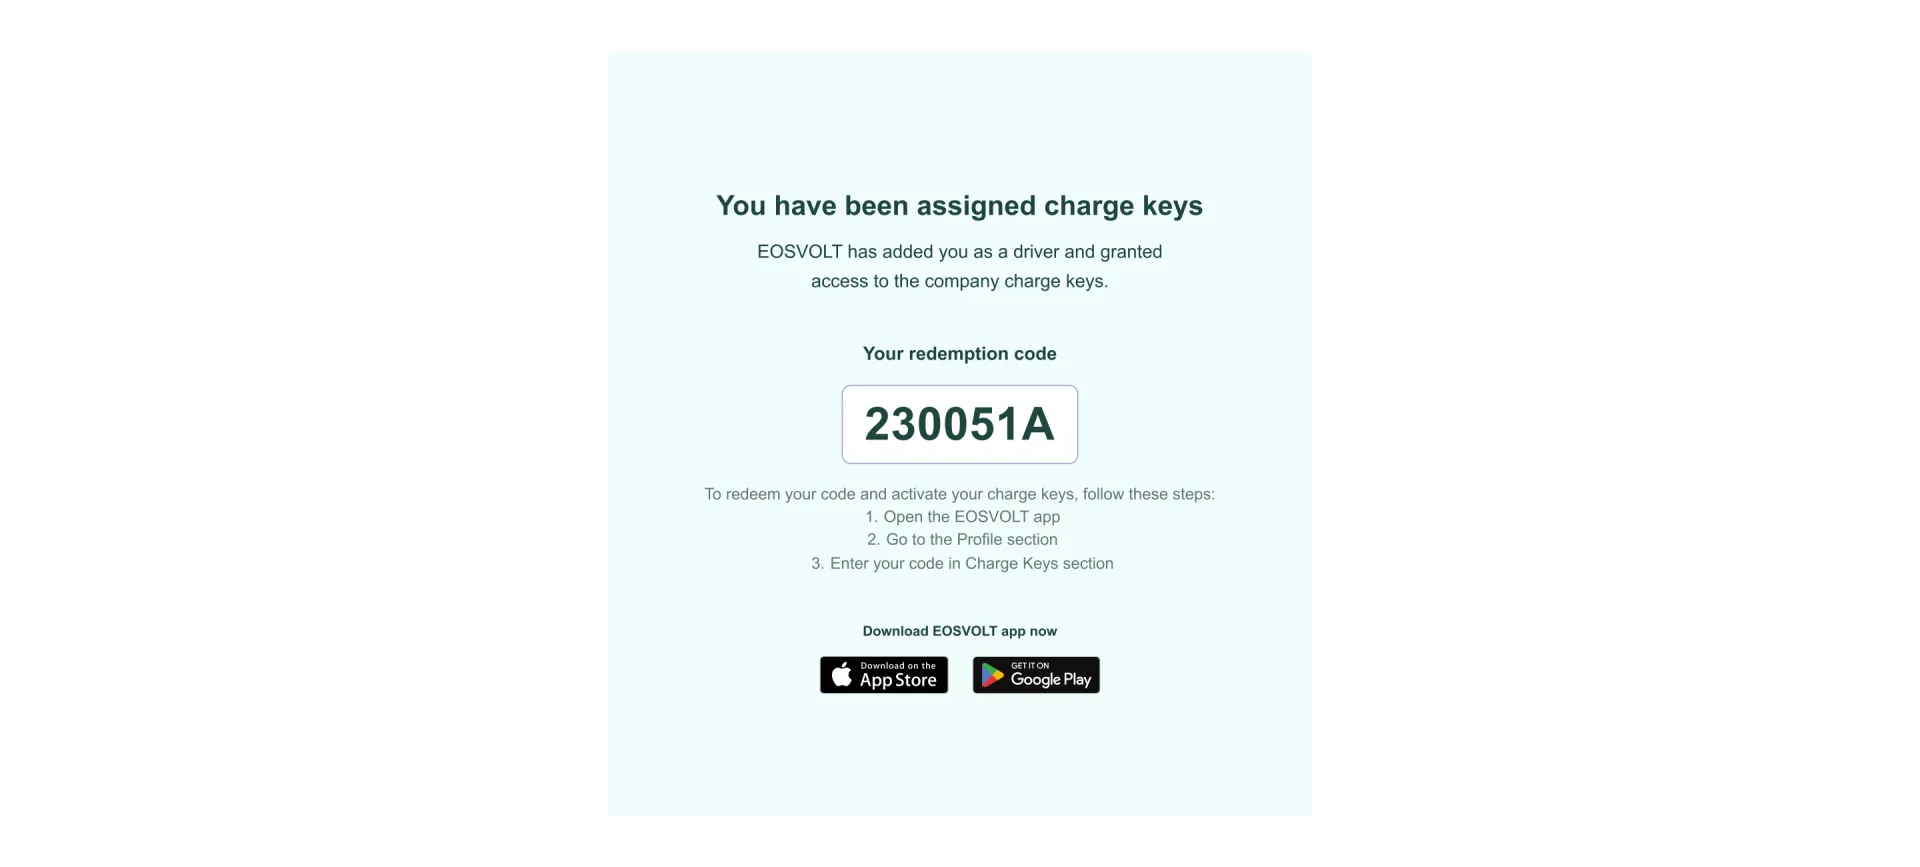
The assigned driver will receive an email invitation containing a code to redeem in the application to join the team. An example of the email is shown below.
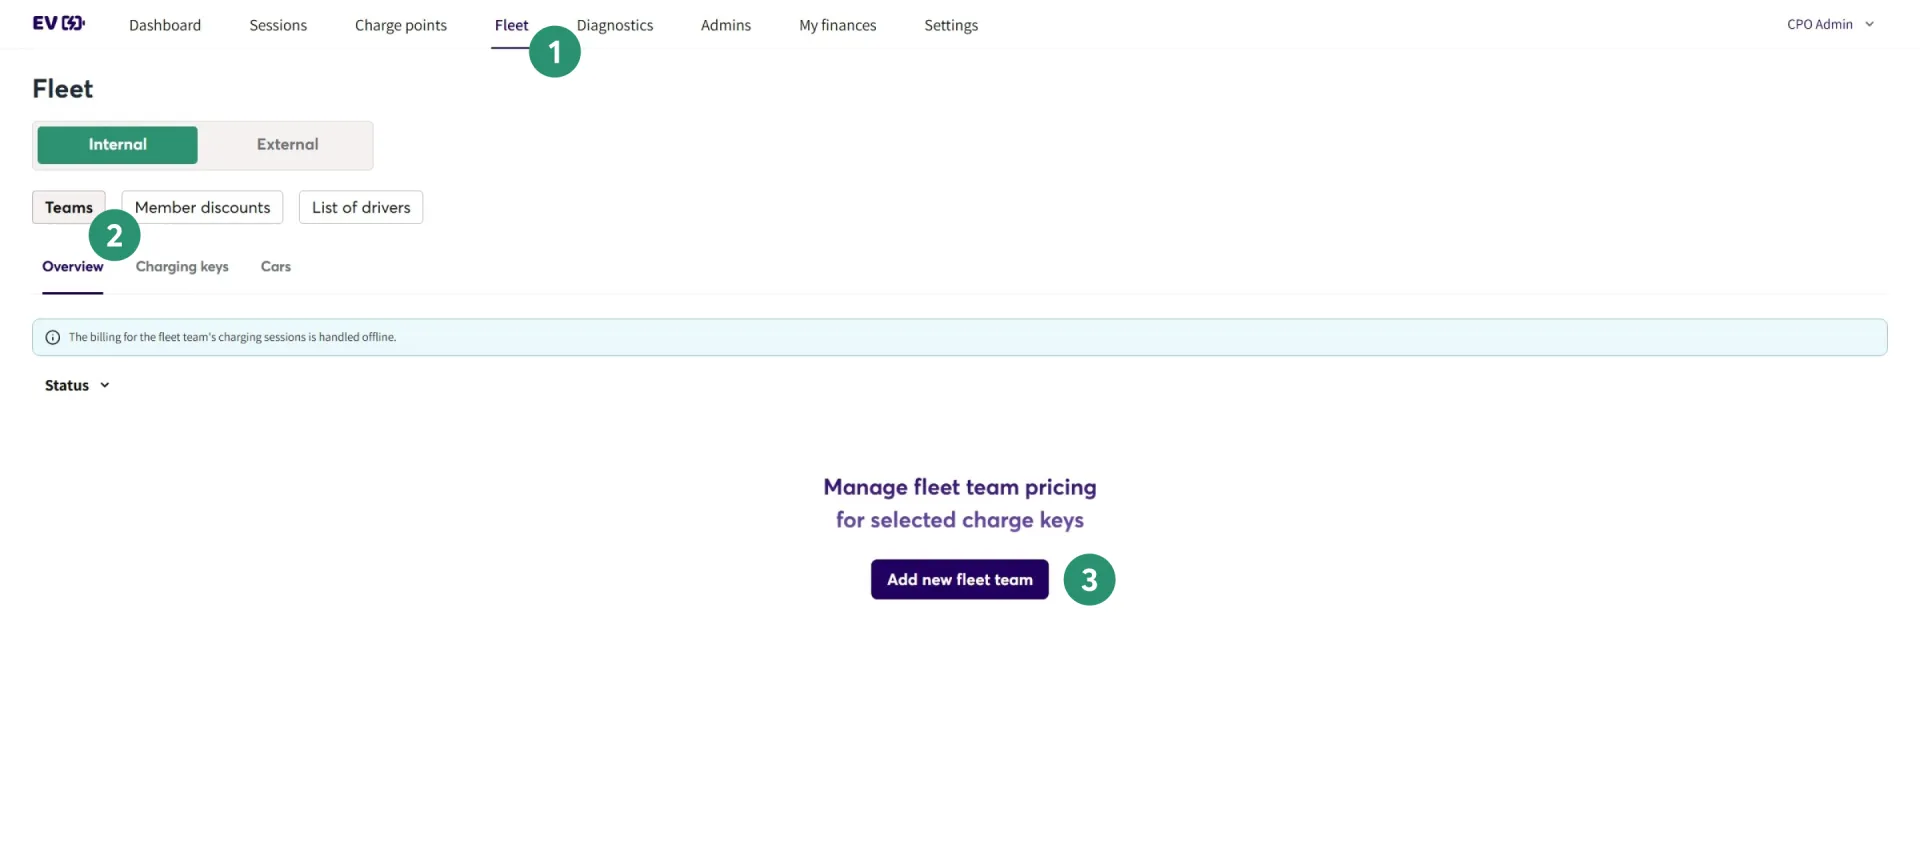
- On the top navigation bar, click "Fleet"
- Select "Teams"
- Click "Add new fleet team"
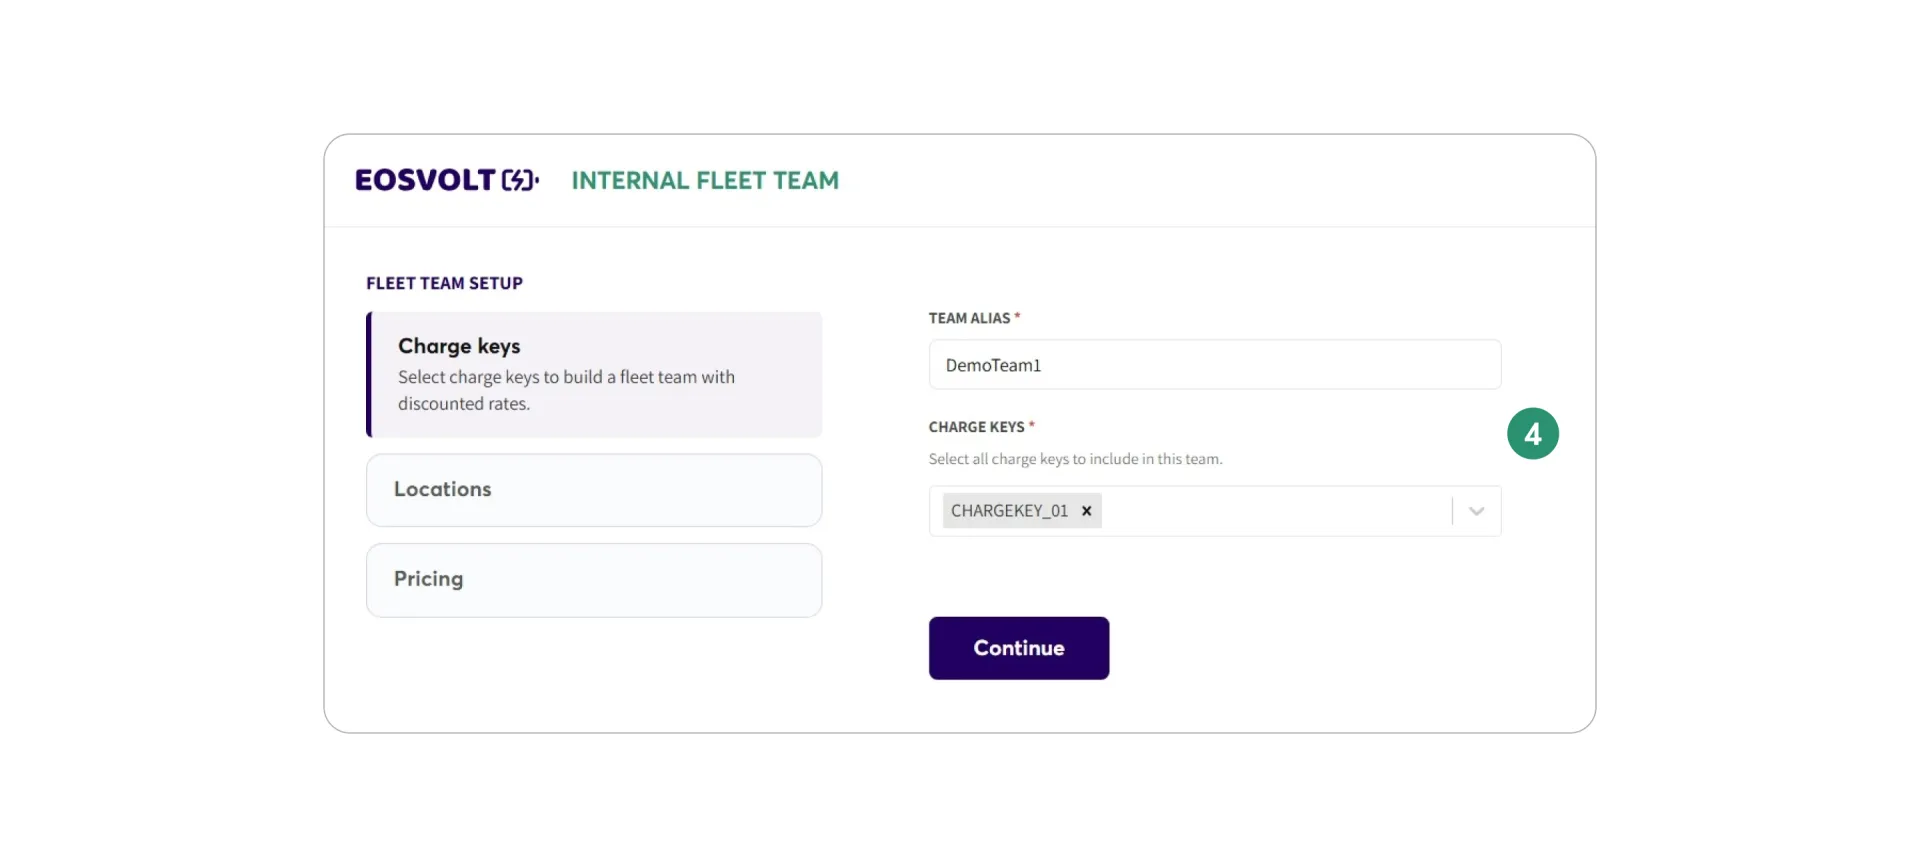
- Enter the discount alias and assign drivers.
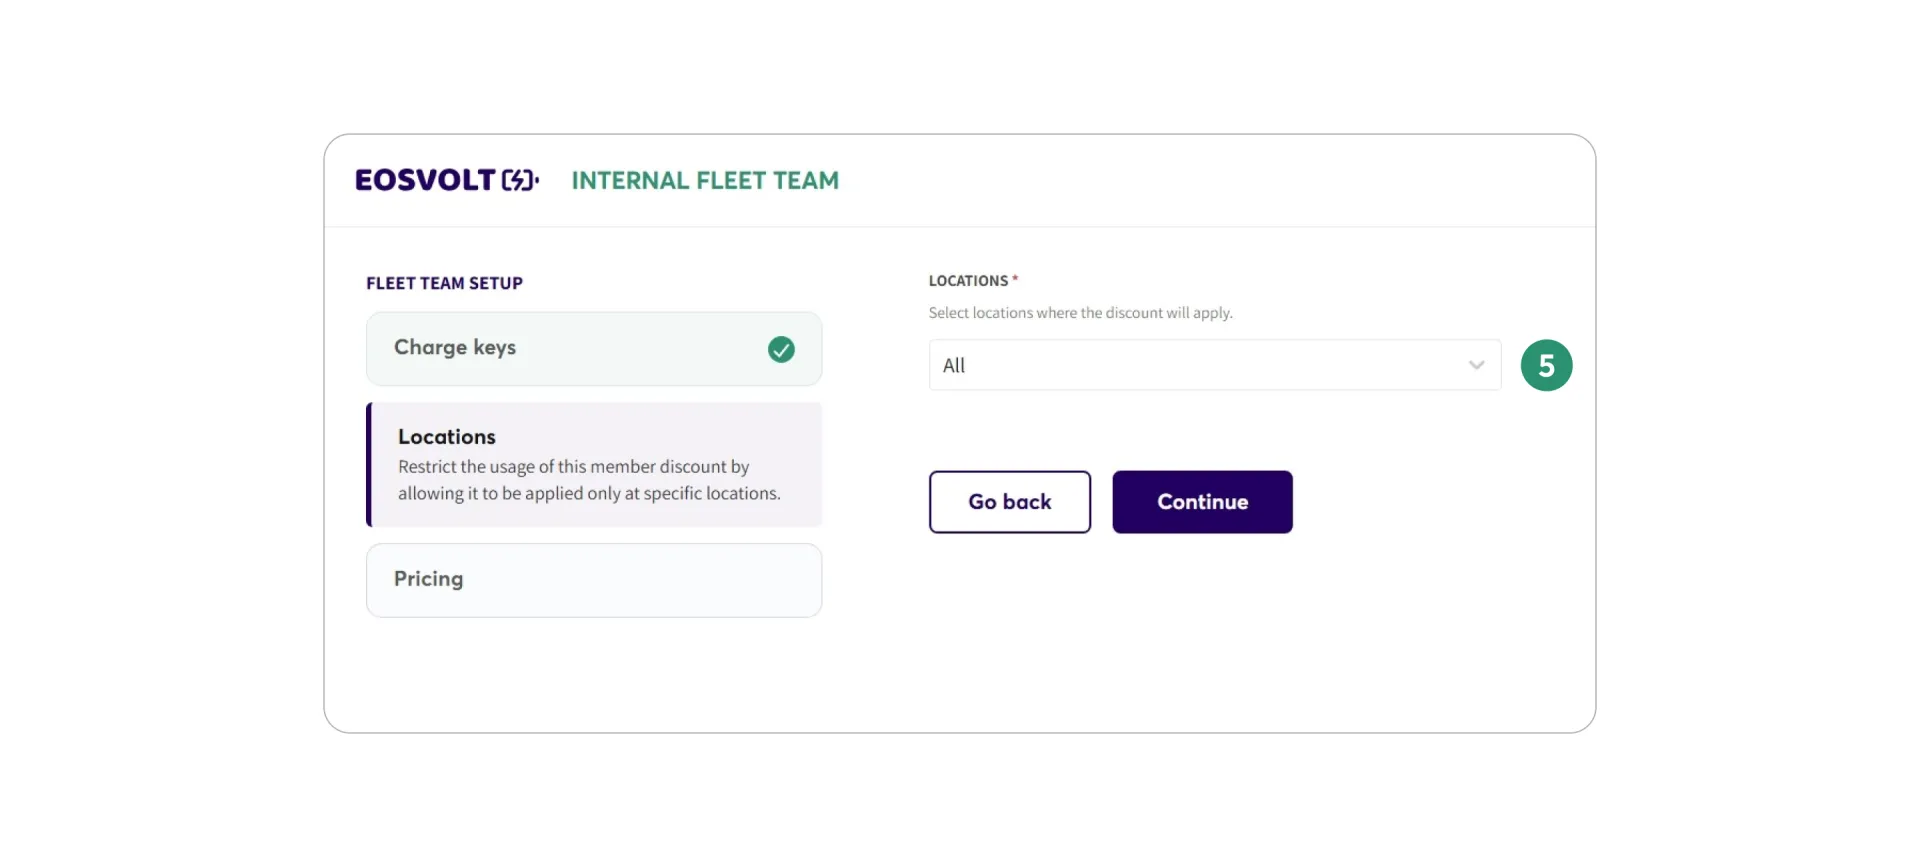
- Define location restrictions.
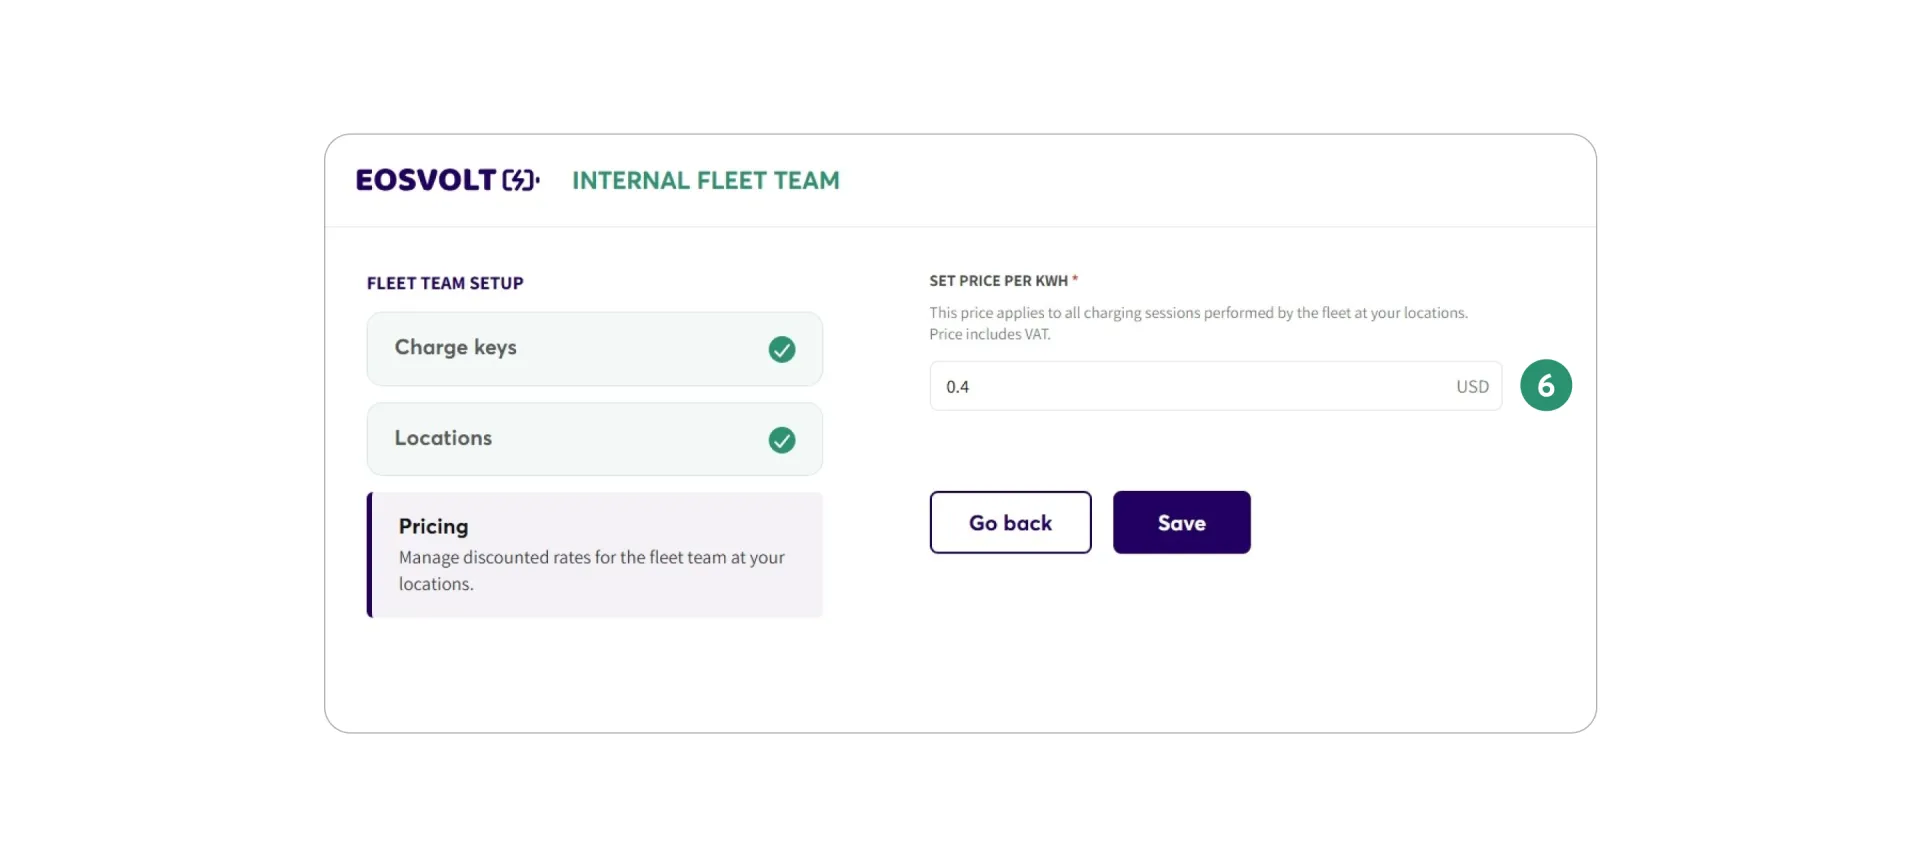
- Set the pricing for the team.
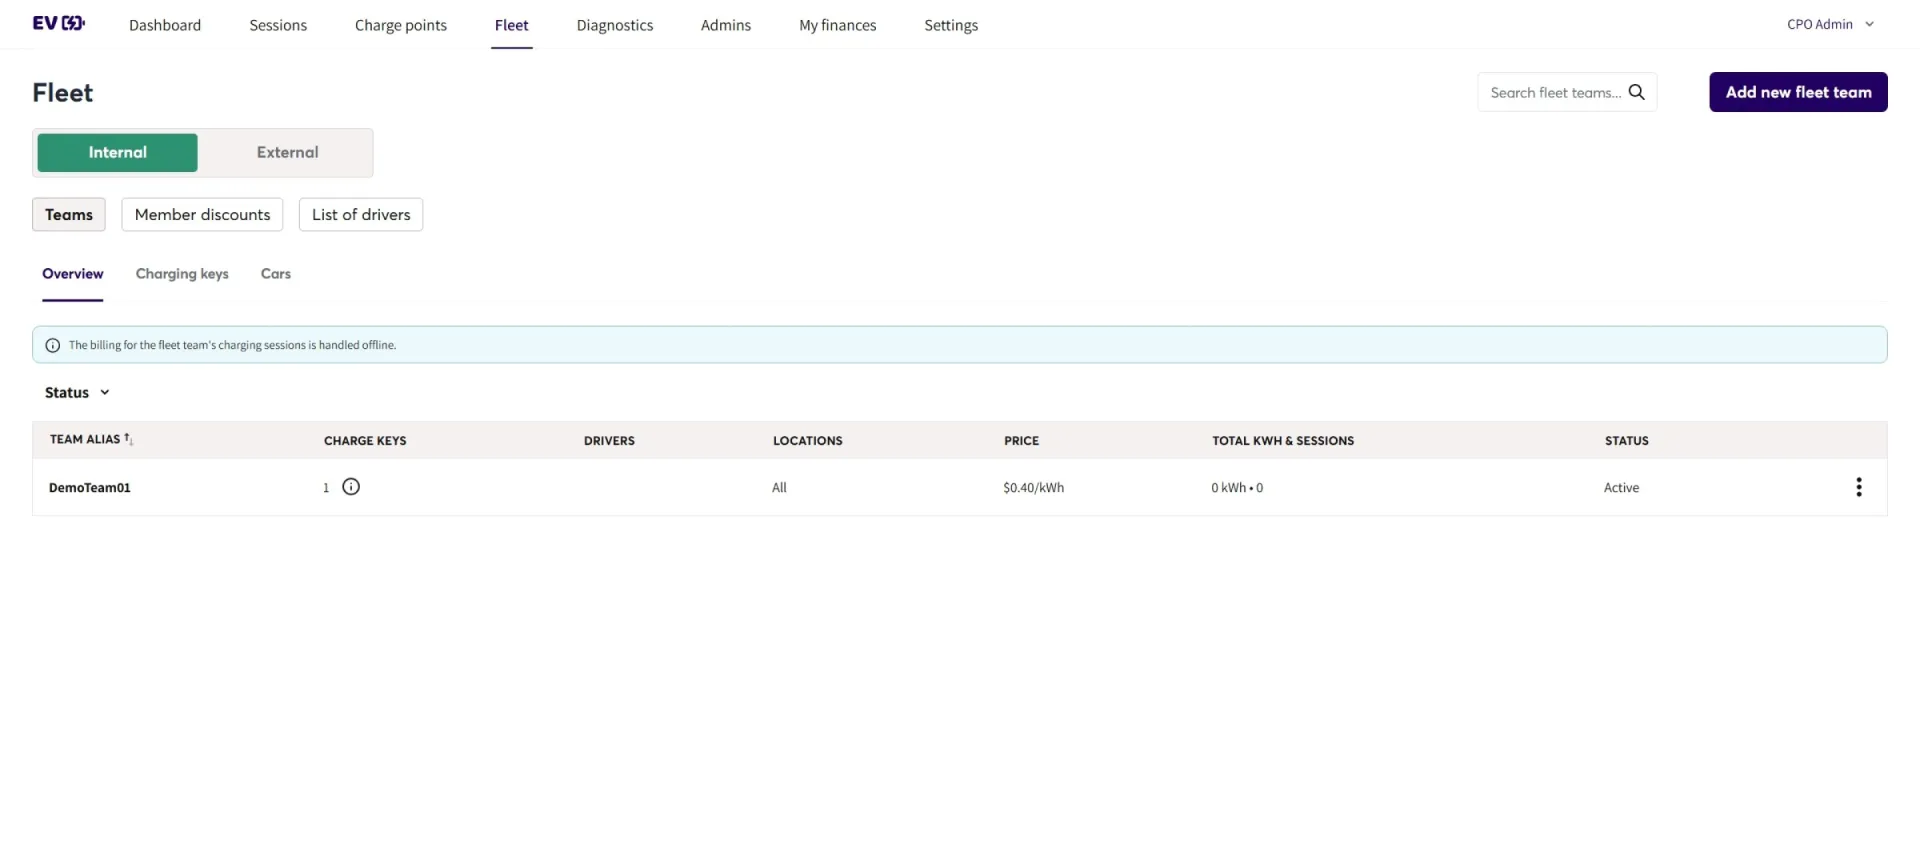
Please note that sessions initiated with a charge key belonging to a fleet team will require offline billing.
Charge keys will not be active if the location is not within the allowed list.
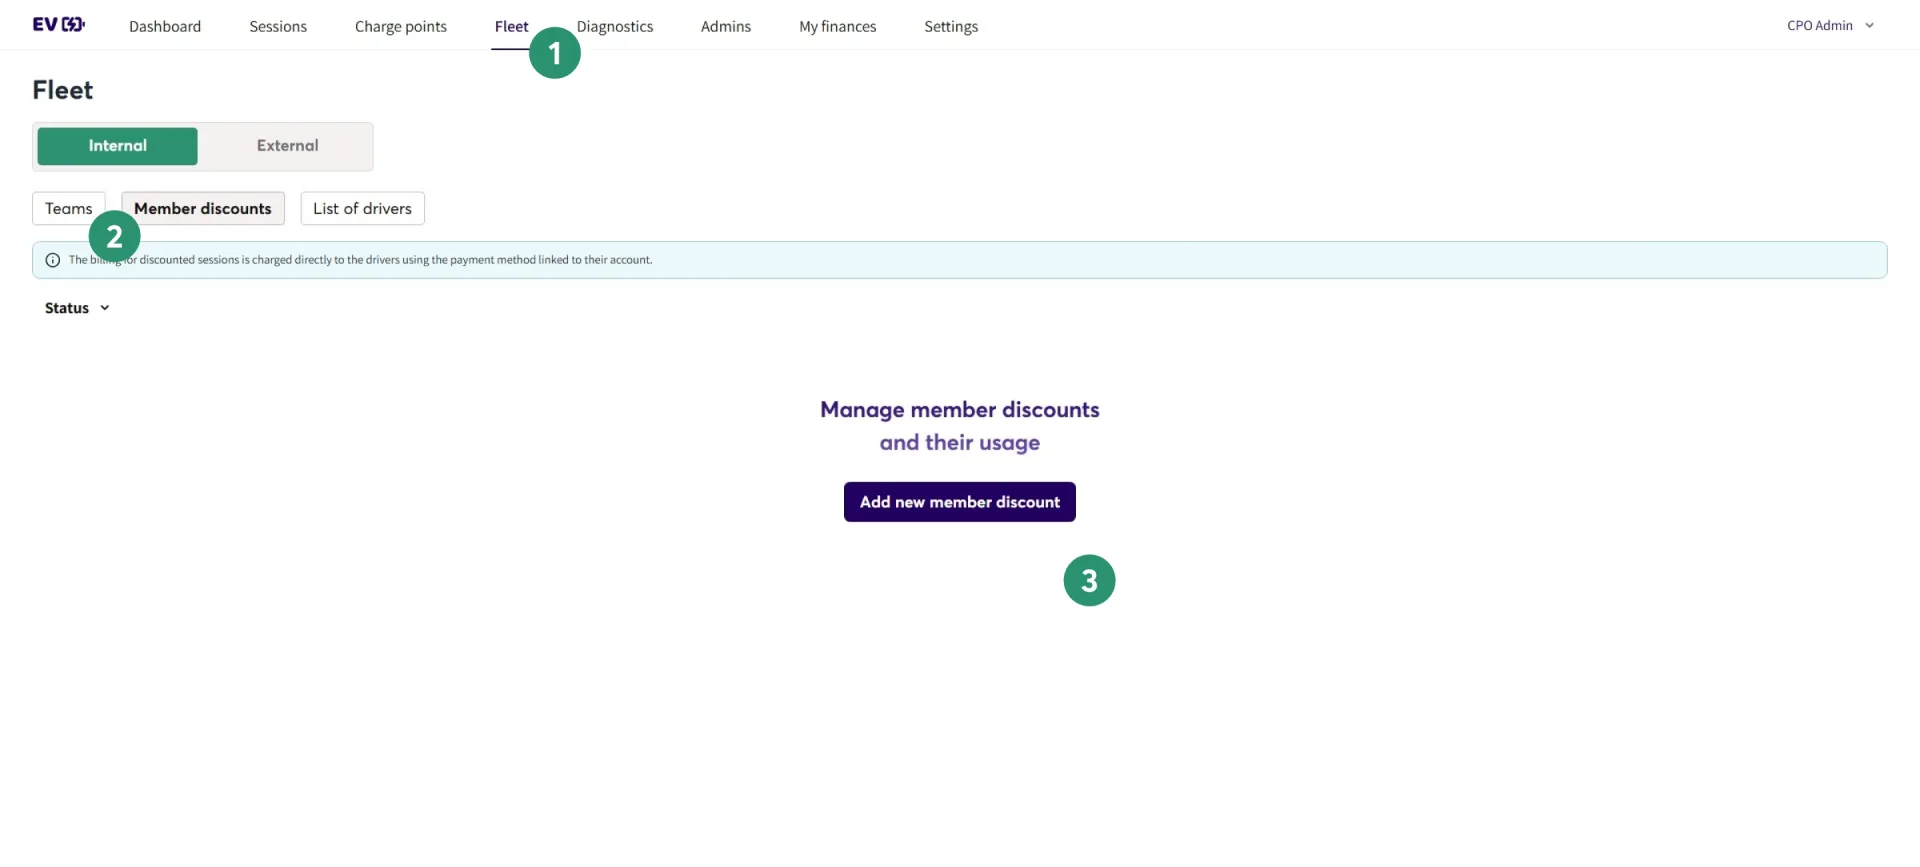
- On the top navigation bar, click "Fleet"
- Select "Member Discounts"
- Click "Add new member discount"

- Enter the discount alias and assign drivers.
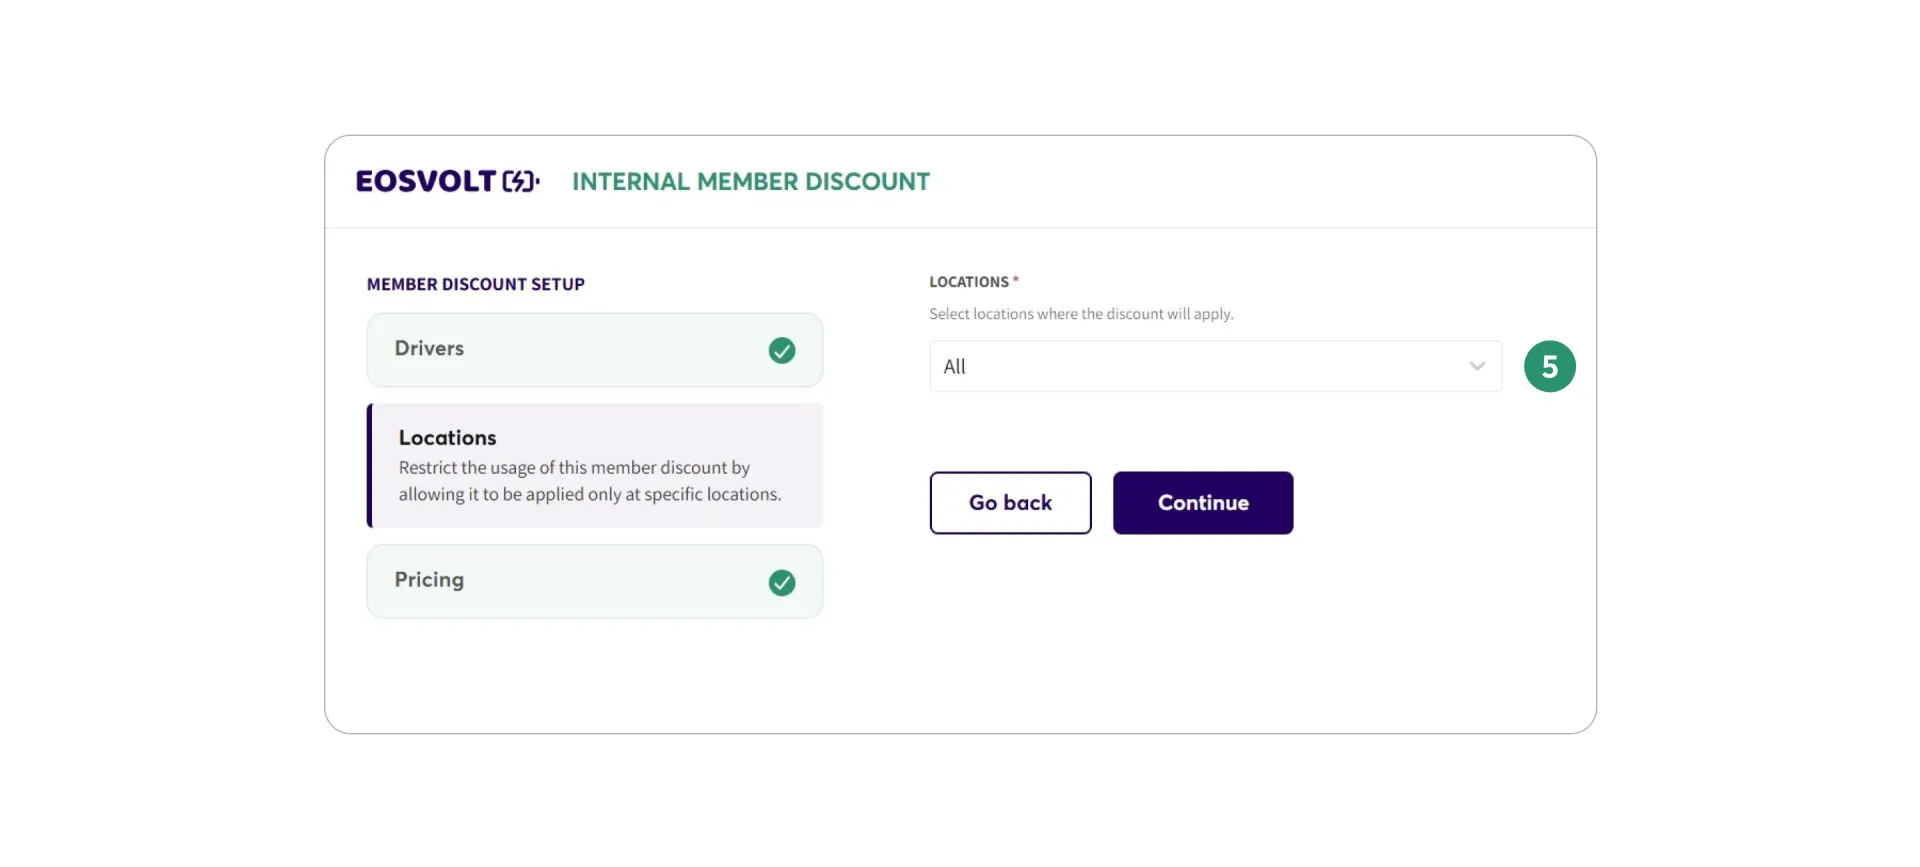
- Define location restrictions.

- Set the pricing for the team.
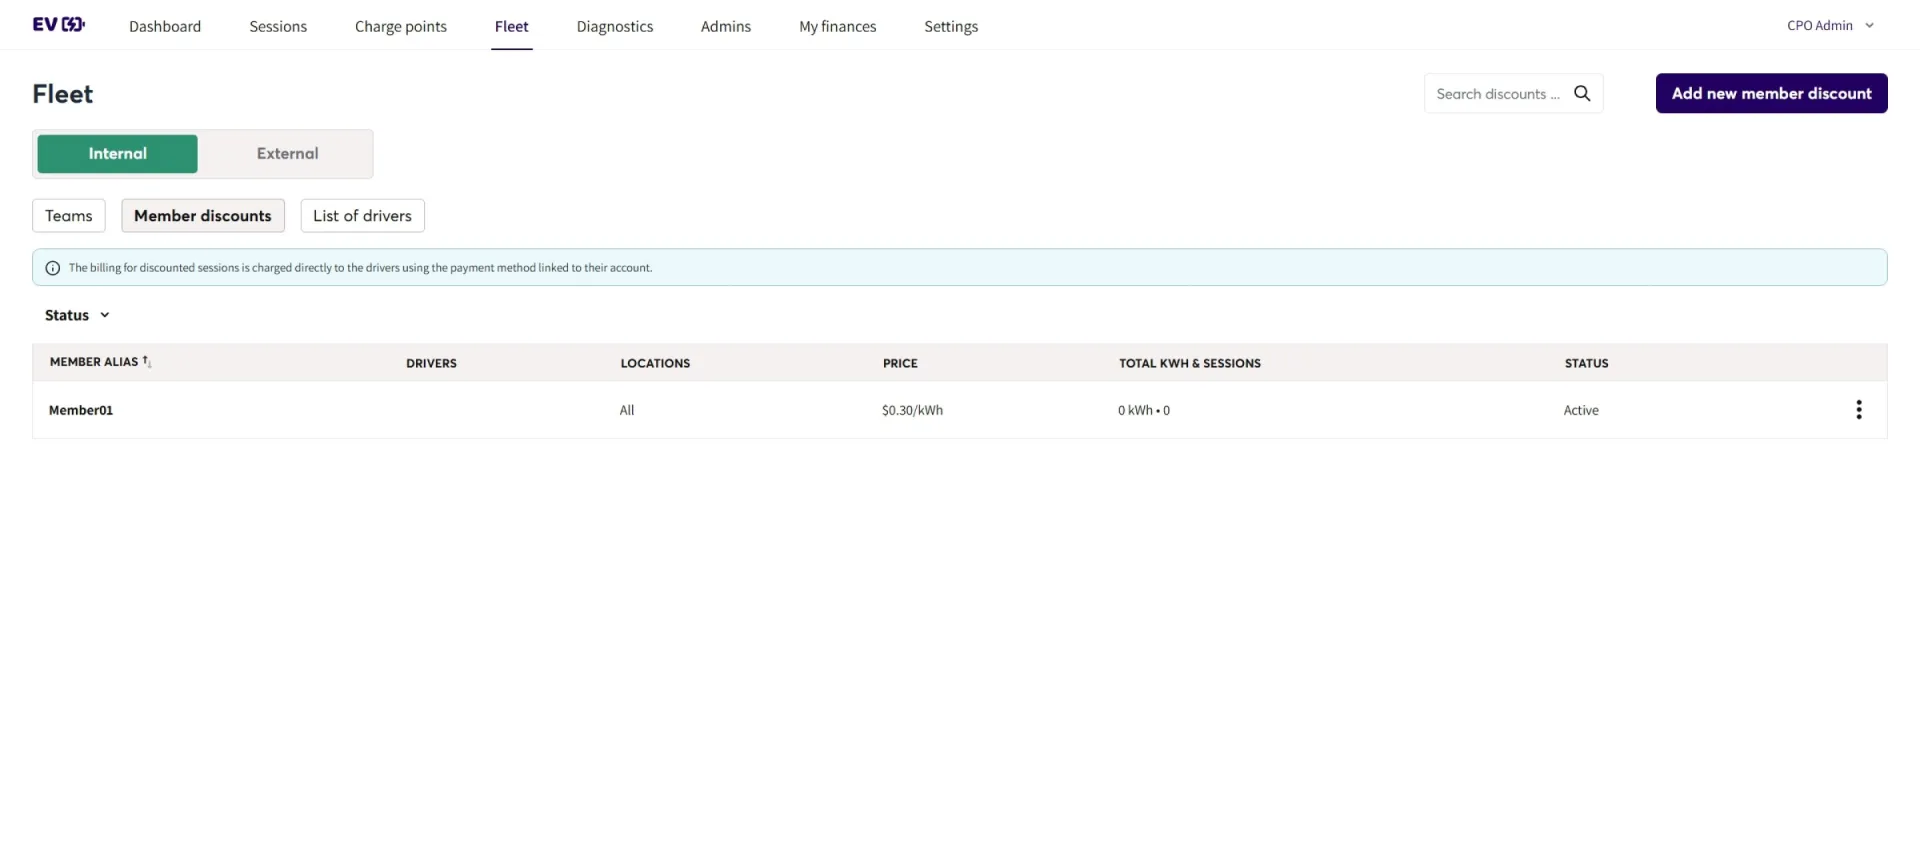
Sessions initiated by a driver in an allowed location will receive a discounted price; other locations will be charged according to their respective settings.
Data can be segregated for each company through the use of internal or external company settings. Multiple external companies can be accommodated.
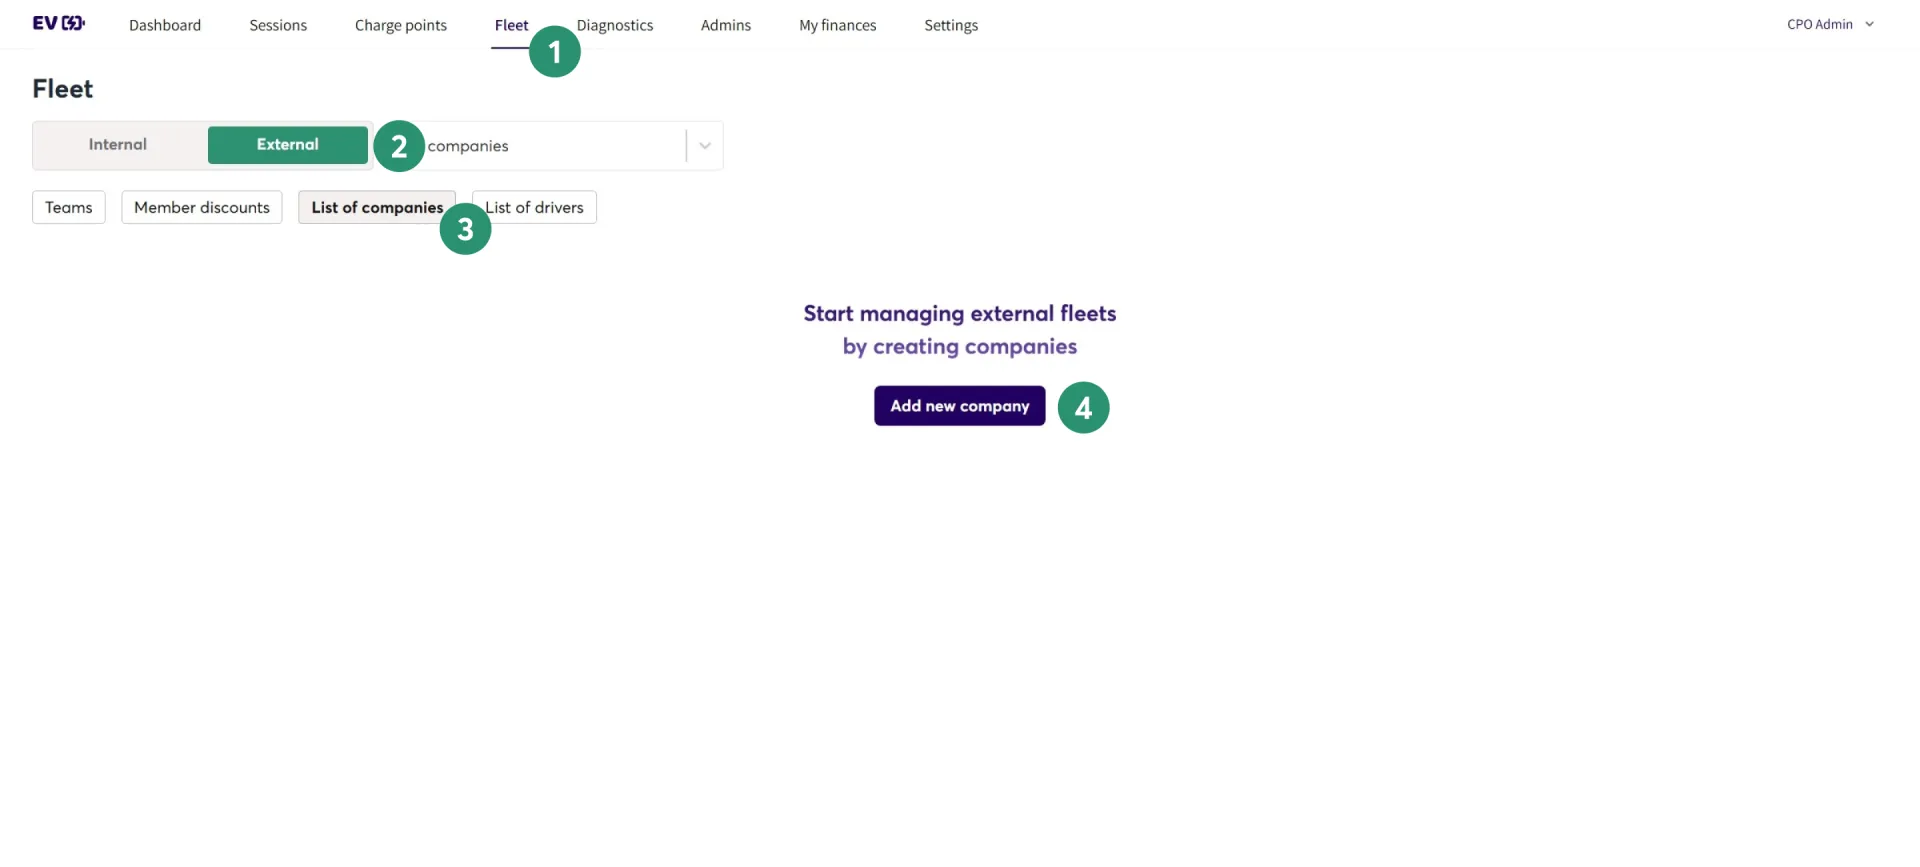
- On the top navigation bar, click "Fleet"
- On the toggle, select "External"
- Select "List of companies"
- Click "Add new company"
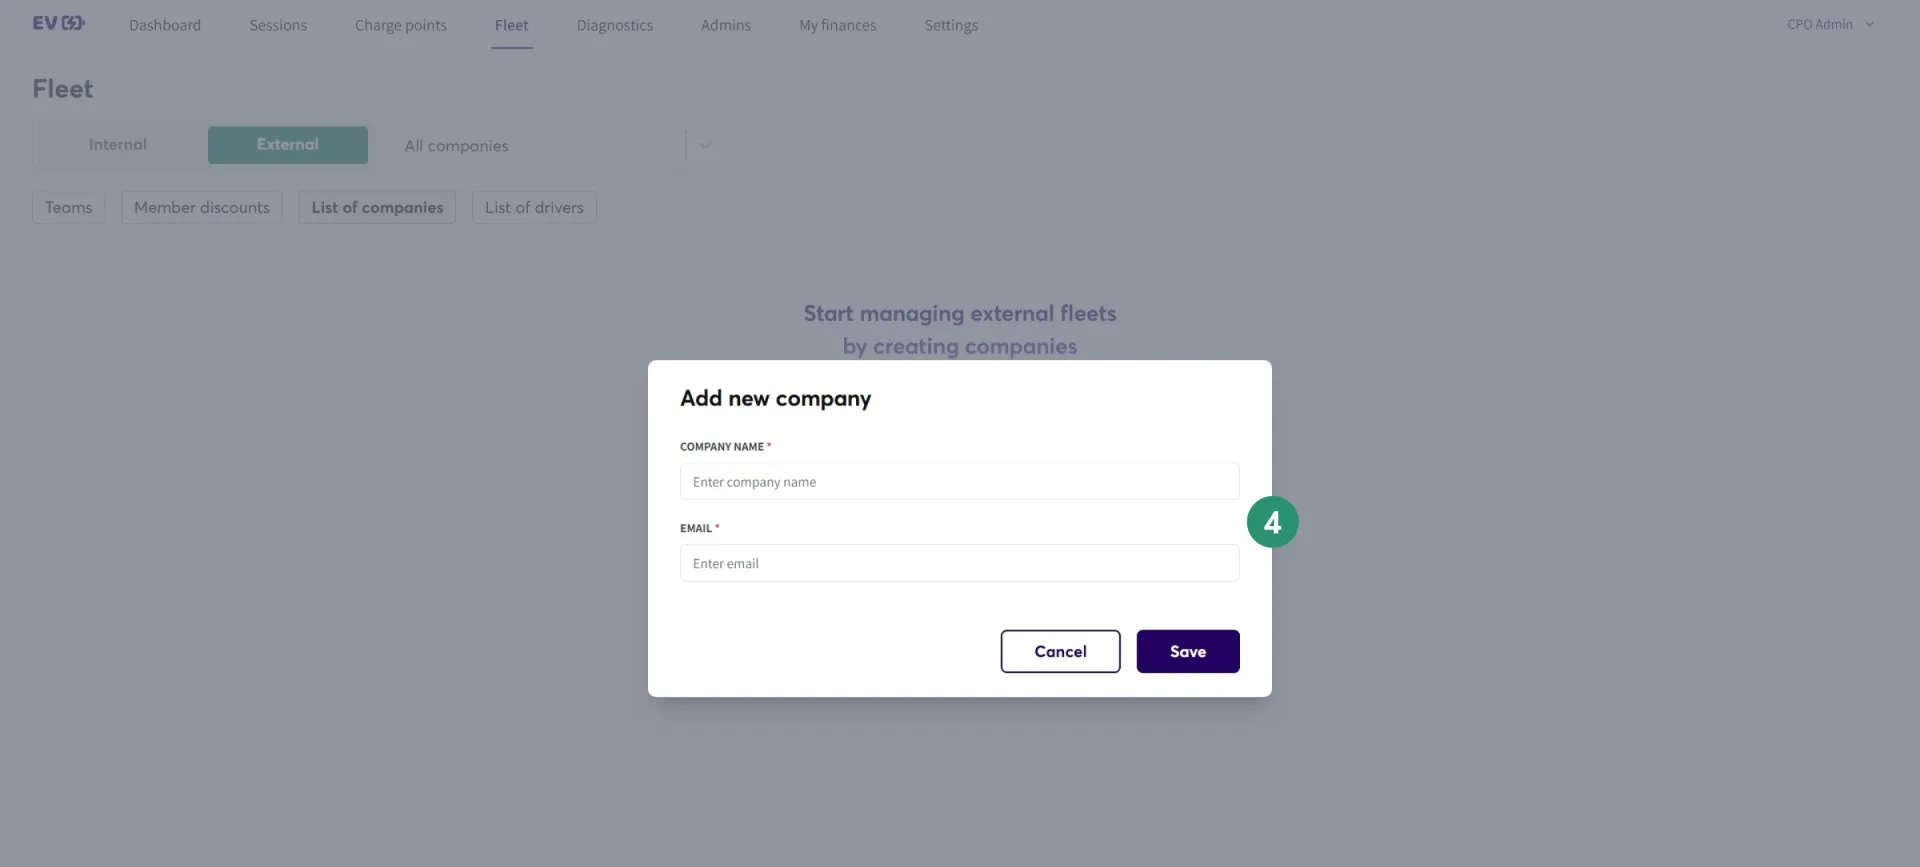
- Enter the company name and email address for the designated company administrator.
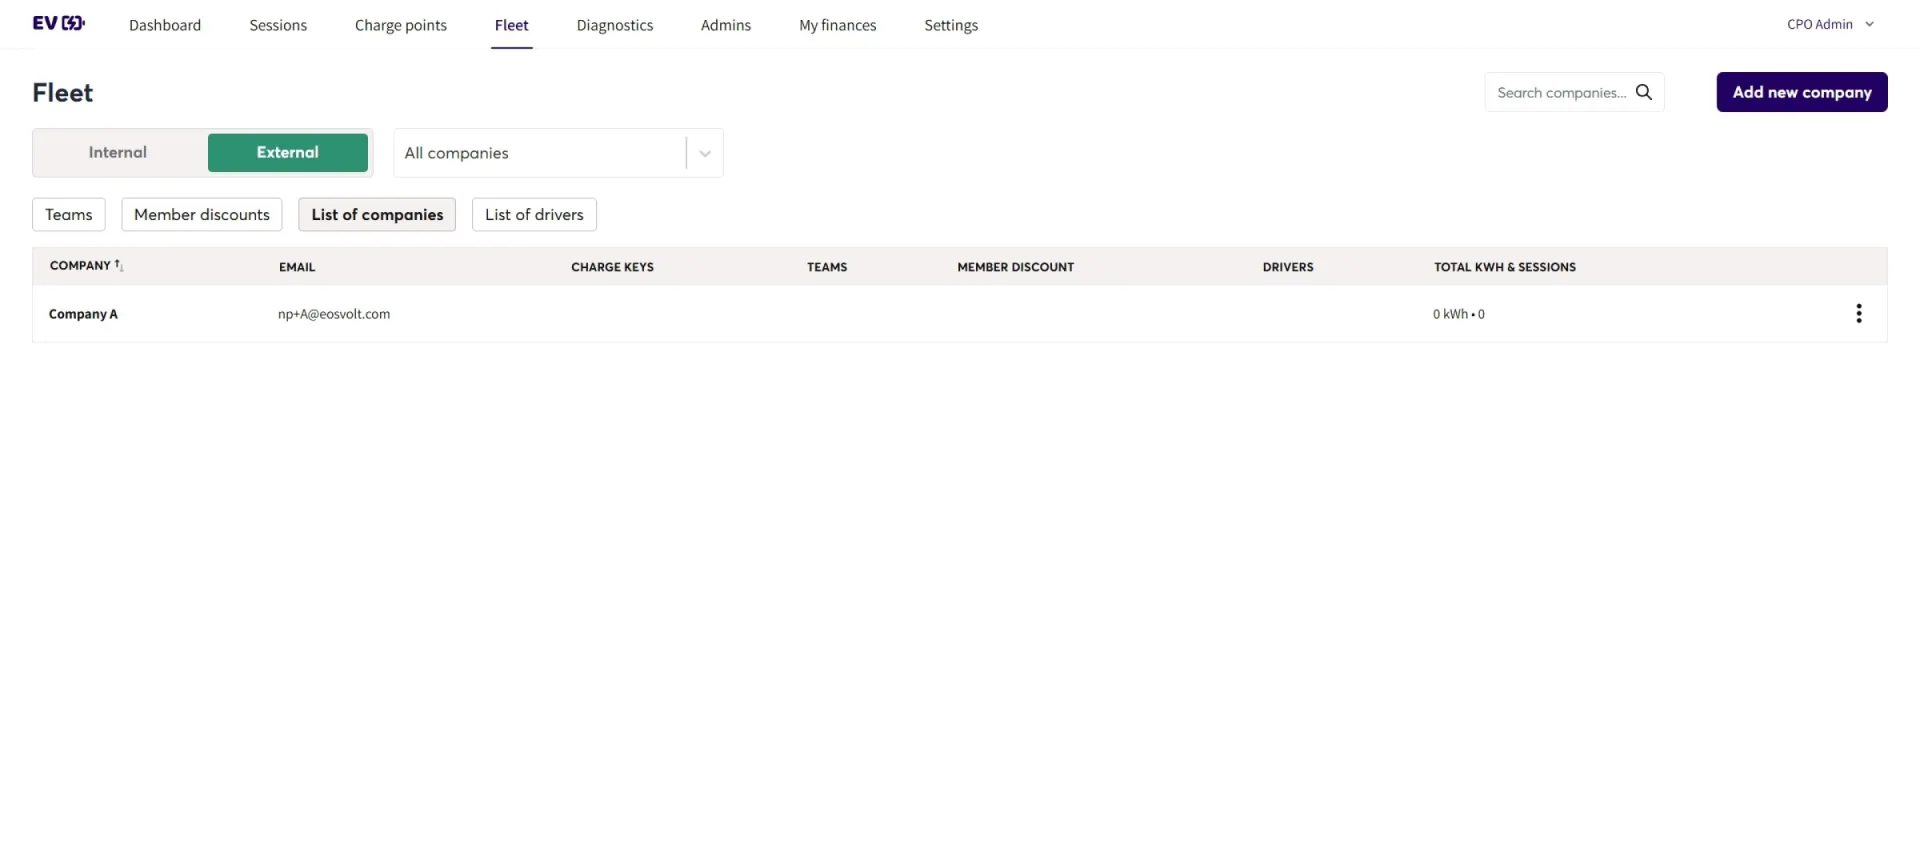
The newly created external company will now be available for selection via the dropdown menu.