CPO Guide
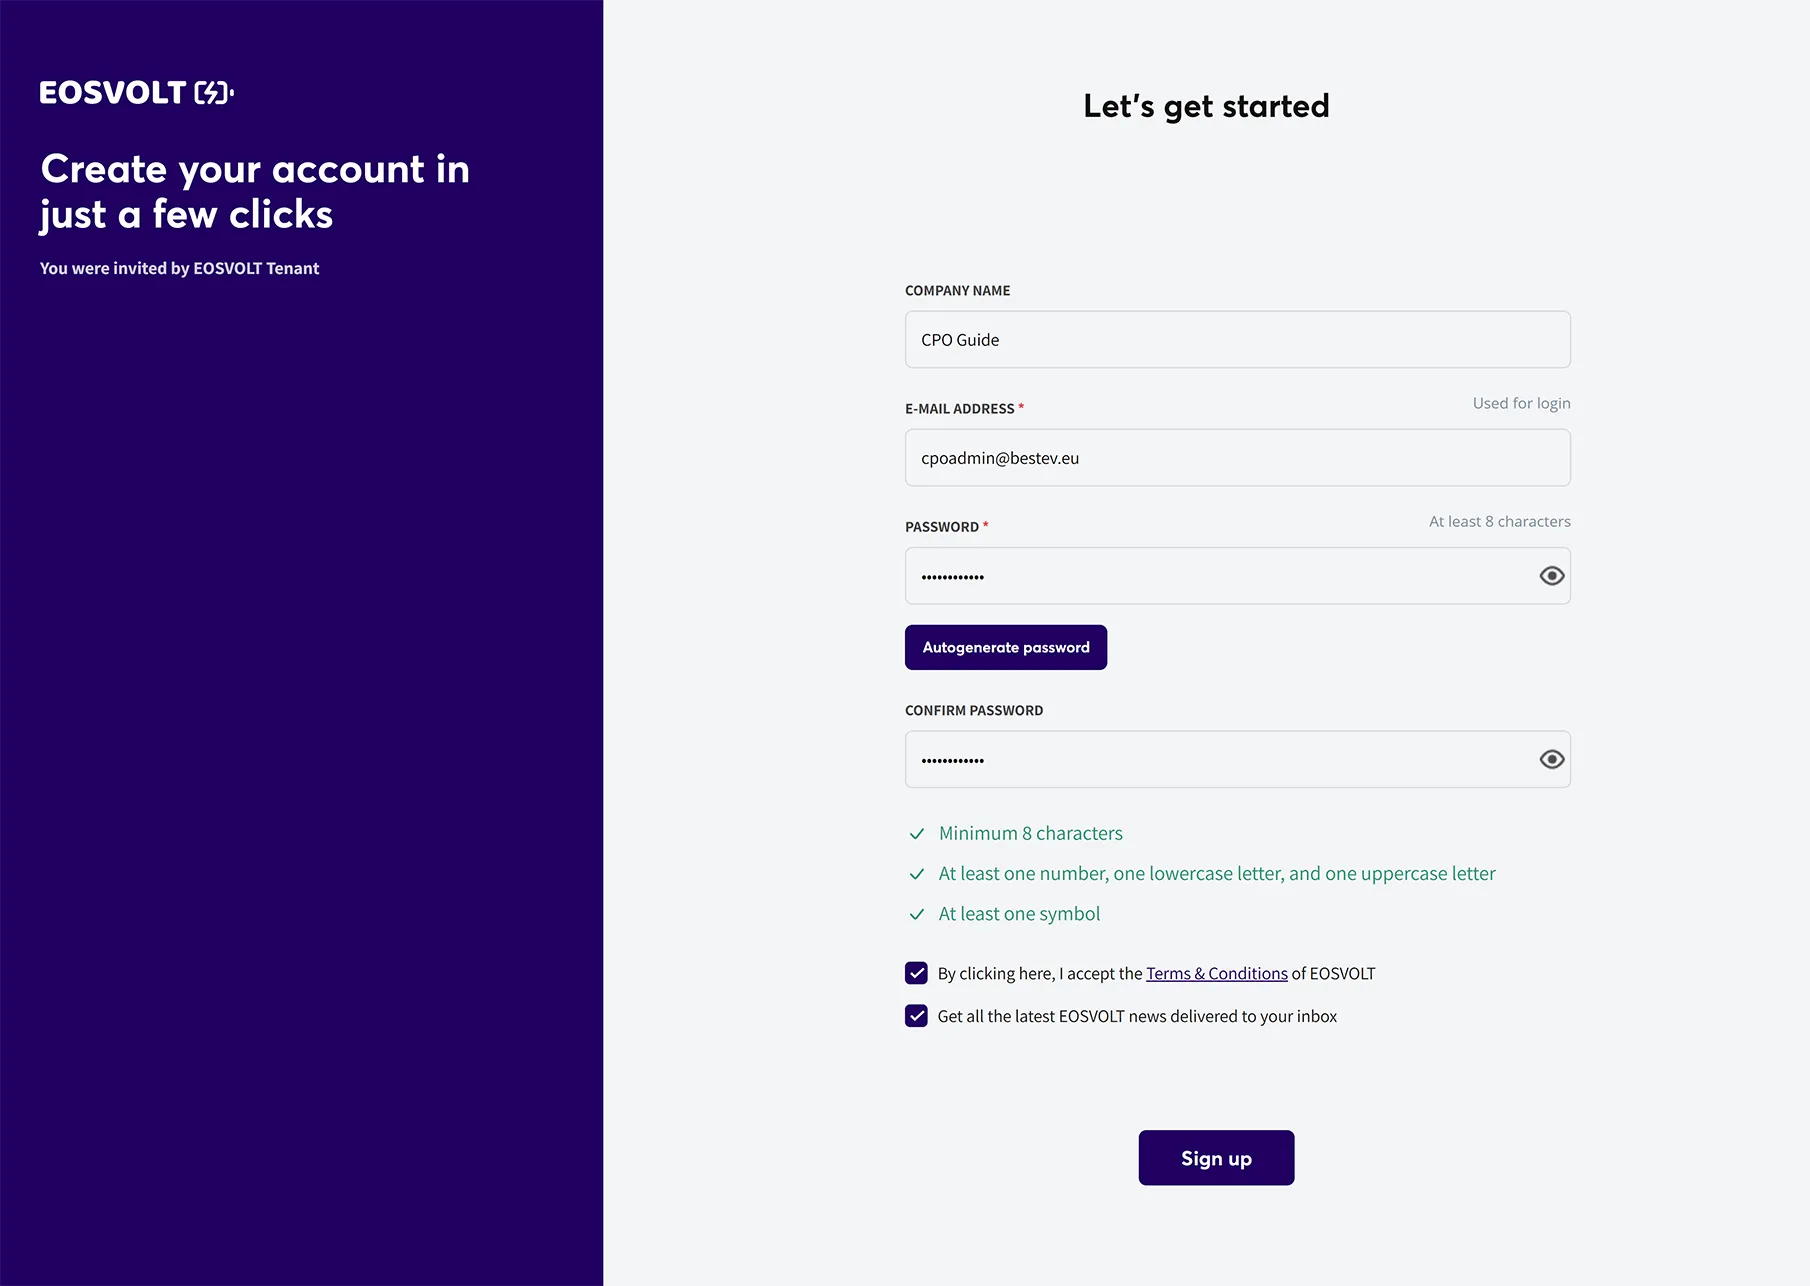
Click on the invitation link sent to your email address.
You will be taken to the registration page, where you will set up your account.
The email address you enter here will be your login to the platform.
NOTE: This address can be different from the email address you received the invitation.
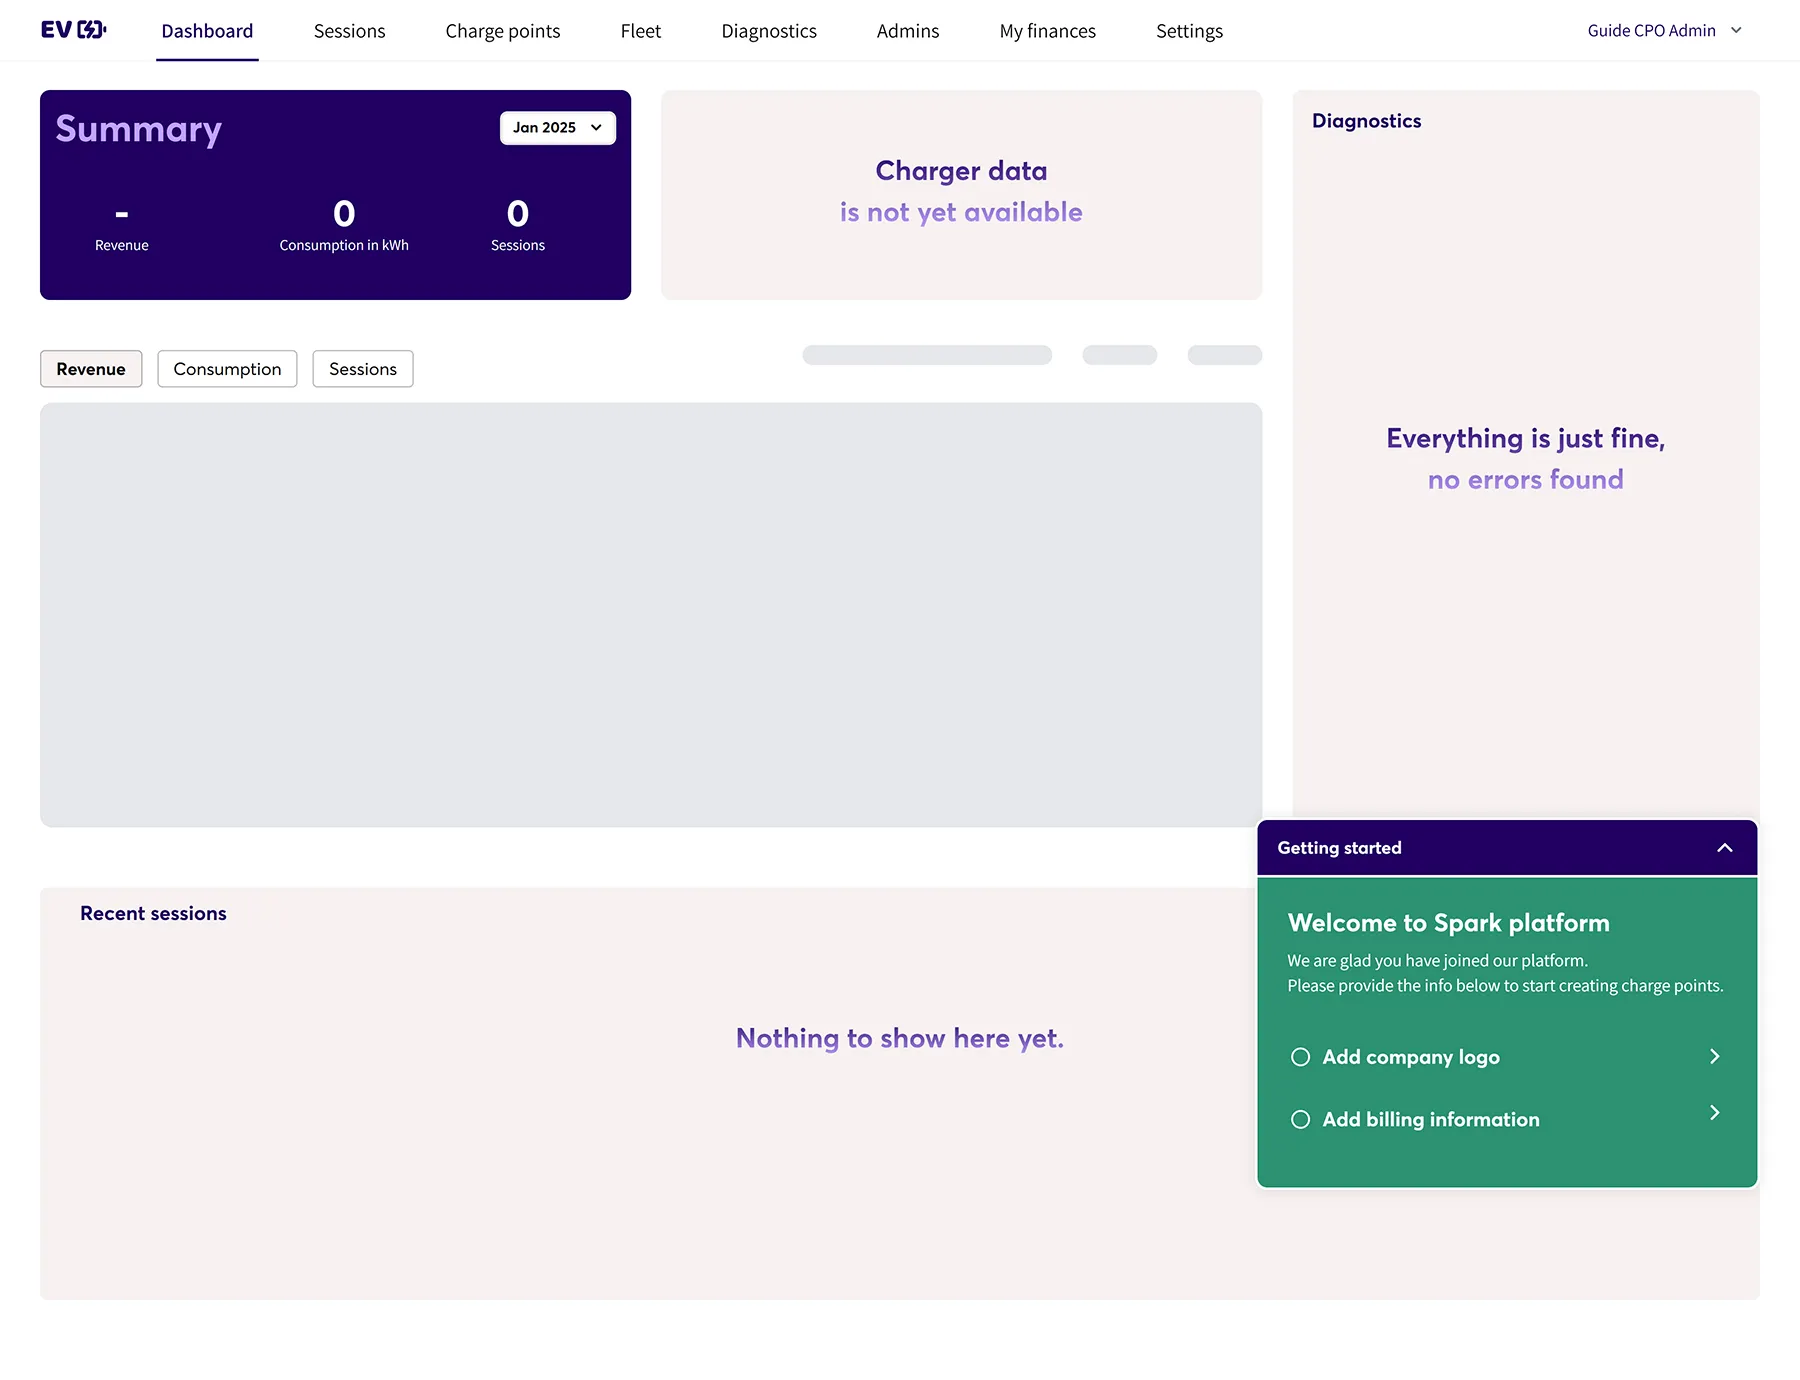
Your dashboard will initially appear empty and will populate with data after the first transaction is registered on your charger.
Before creating a charge point, please upload your company logo and provide your billing information.
This can be done by following the “Add Company logo” and “Add billing information” buttons.
Your company logo is included on invoices issued to customers for charging sessions.
We recommend using square dimensions of 400px by 400px for optimal display.
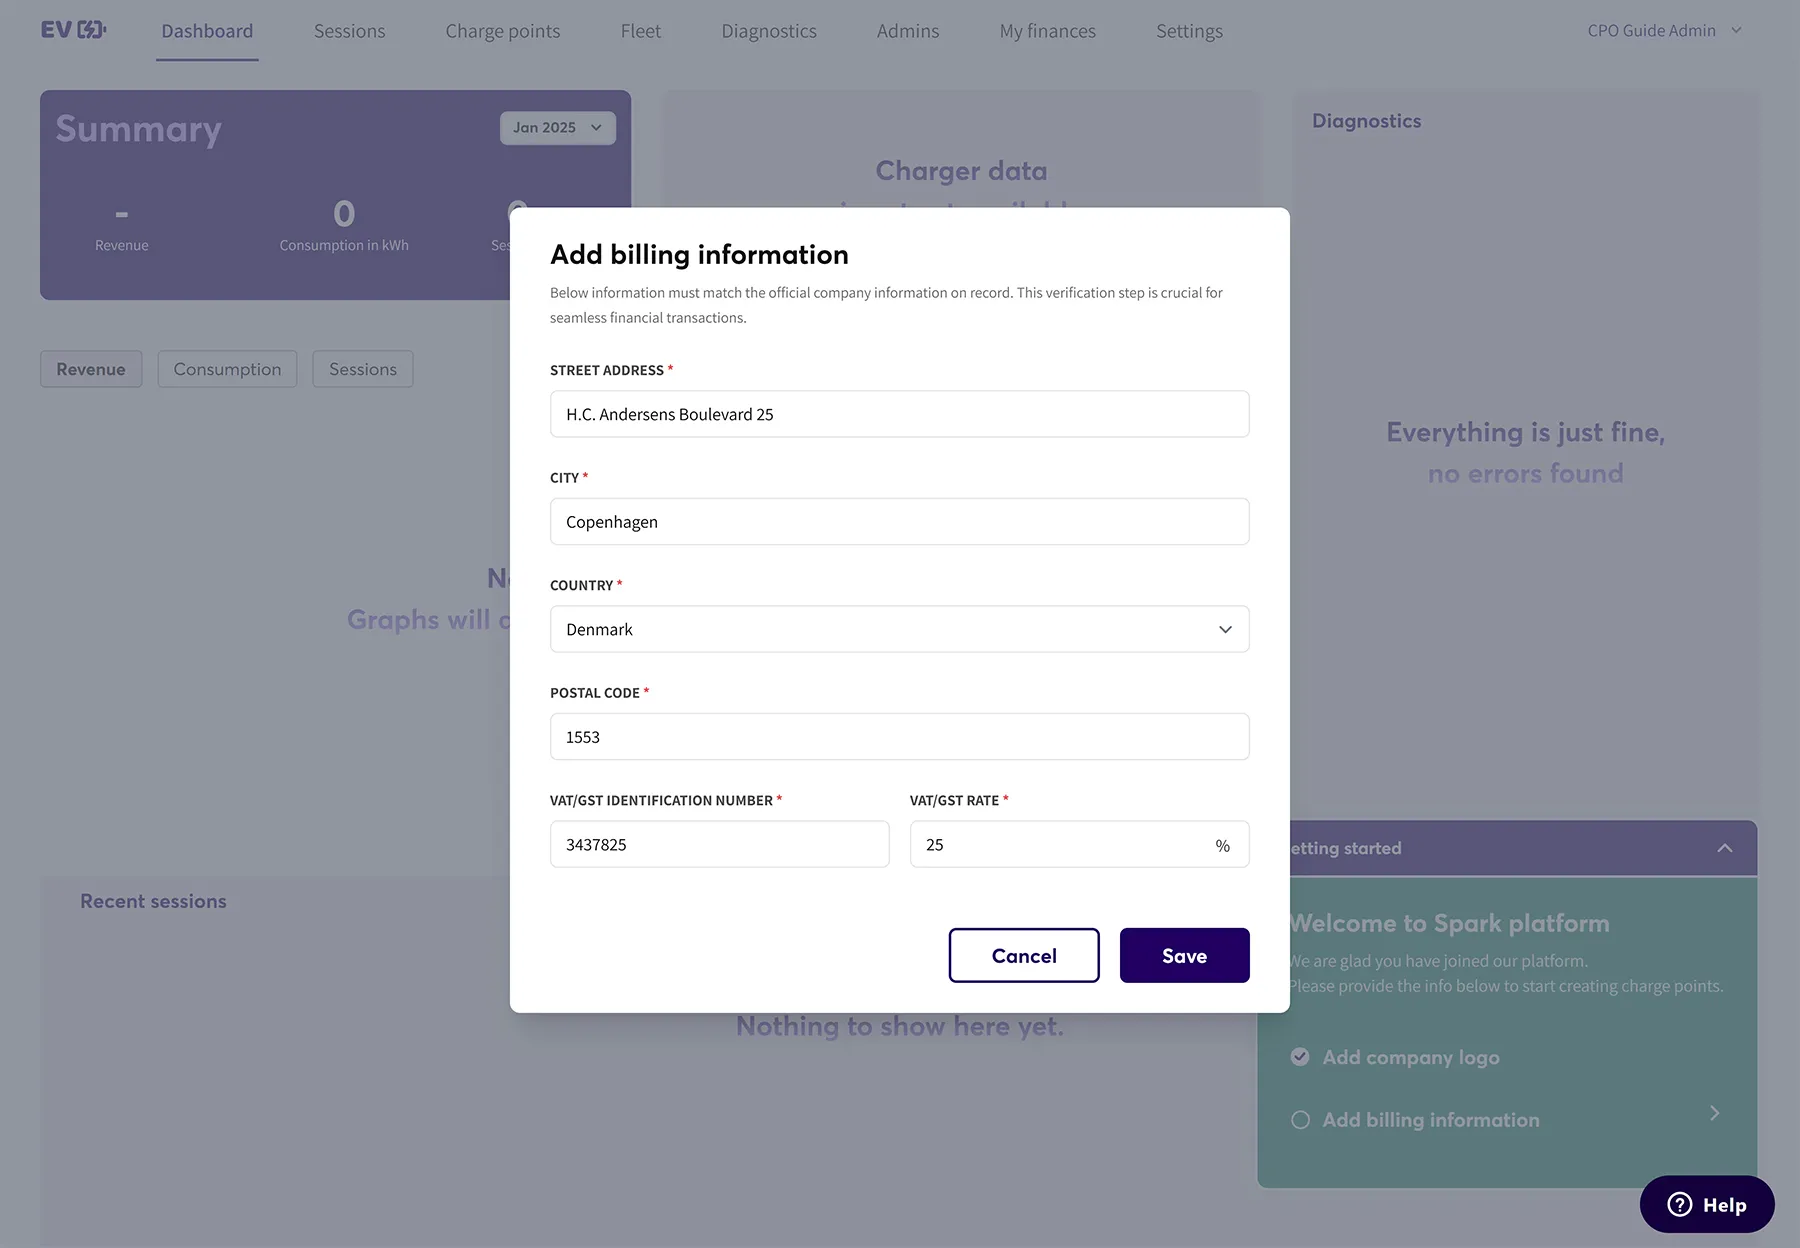
You can fill in your billing information by clicking the green “add billing information” box or by navigating to the settings tab from the Dashboard.
Enter all your billing information.
Please keep this information up to date. This information is used to process your payouts and keeping the information as up-to-date as possible ensures there are no delays when you trigger a withdrawal.