Adding a charger
Note that there are two types of links you can use to connect:
- ws://
- This is the standard WebSocket protocol for an unencrypted connection. Only use this if your charger does not support SSL/TLS encryption or if you are setting up the system in a secure, internal network where encryption is not a concern.
- wss://
- This stands for WebSocket Secure. It's similar to the ws:// link but provides an additional layer of security through SSL/TLS encryption.
- This is highly recommended if your charger supports SSL/TLS and your connection is over a public or less secure network.
* To be able to add a charger, you must first create a location. When this step is completed, go to Charge points / Your_location_name / Chargers and click on Add charger
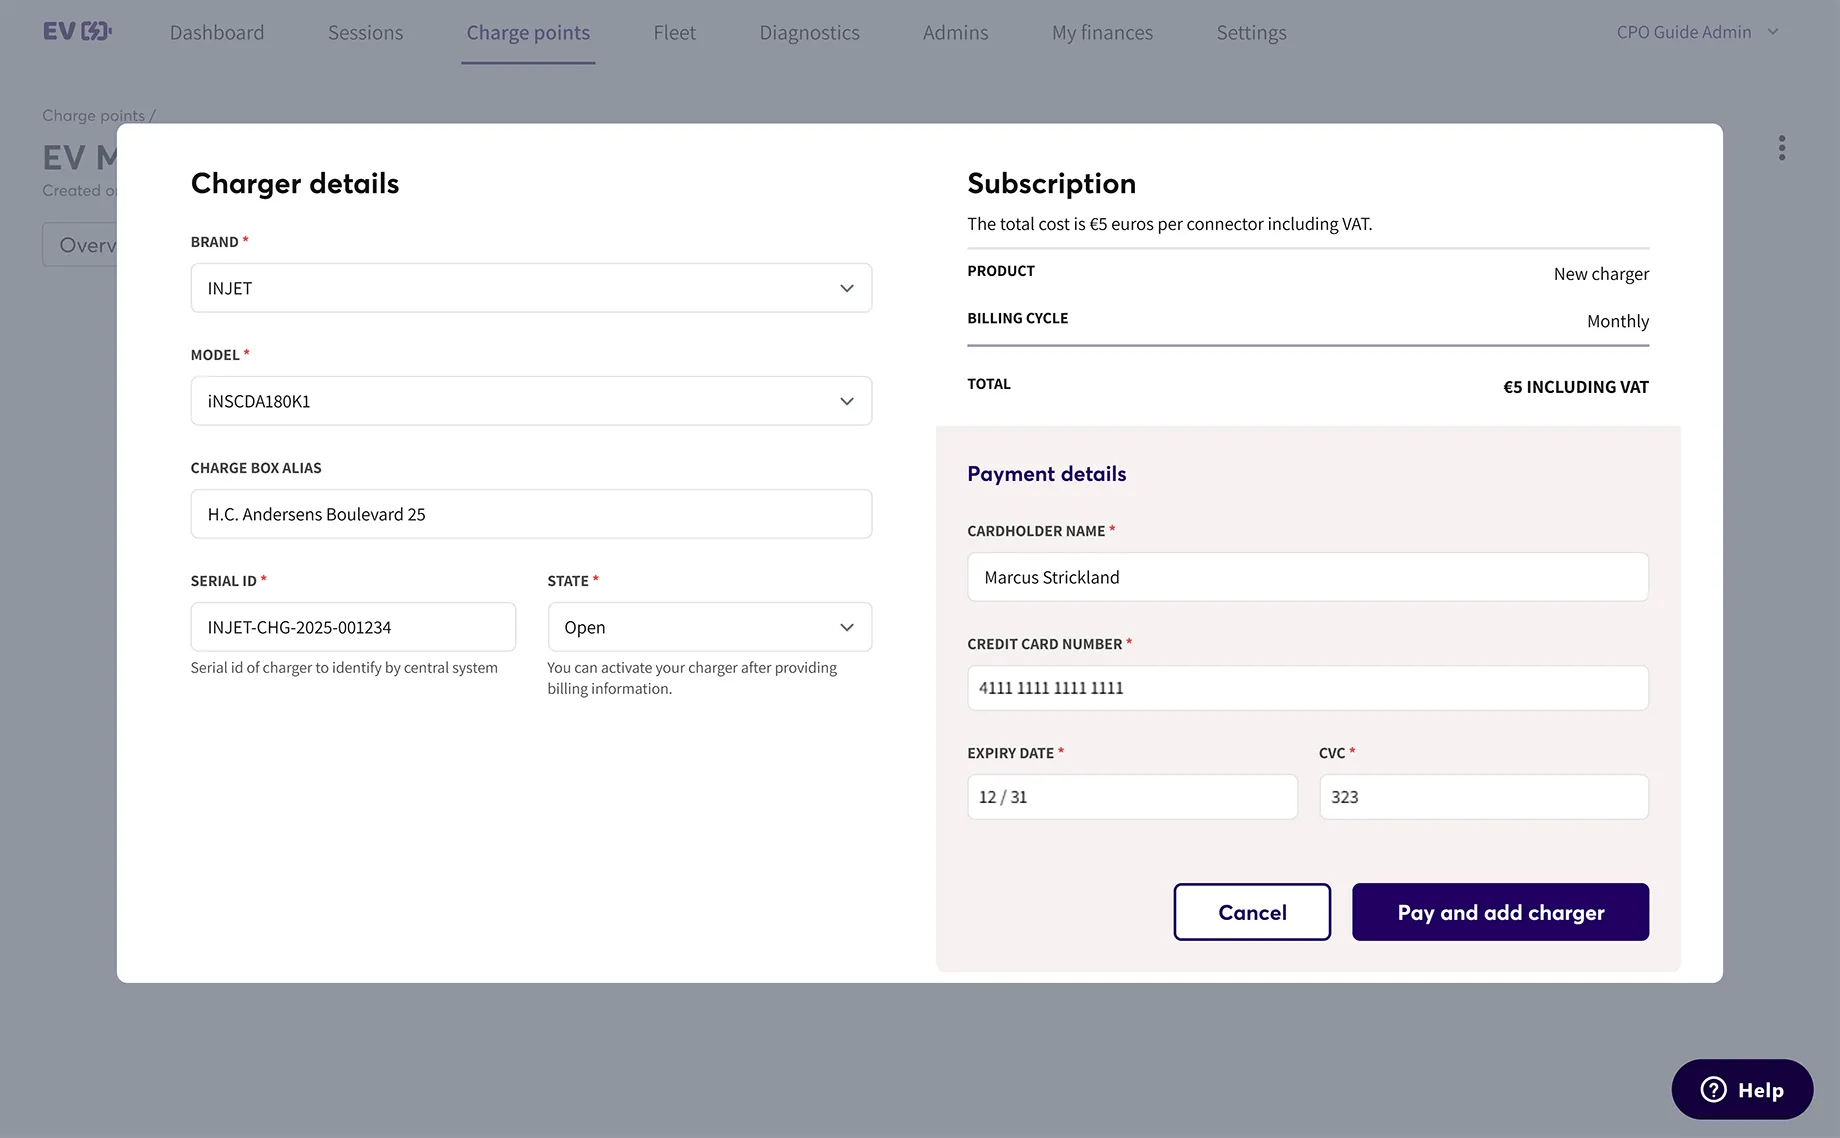
Ensure that the correct brand and model are selected.
If your model is not available on the list, please contact us directly, and our team will be happy to add it.
You will be billed for each charger connector, e.g. if your charger has 2 plugs, we will bill you monthly for each plug. Each plug will use a separate ID and QR code to connect.
Then, please locate your charger's Serial ID. Double-check to make sure it's correct when adding the charger.
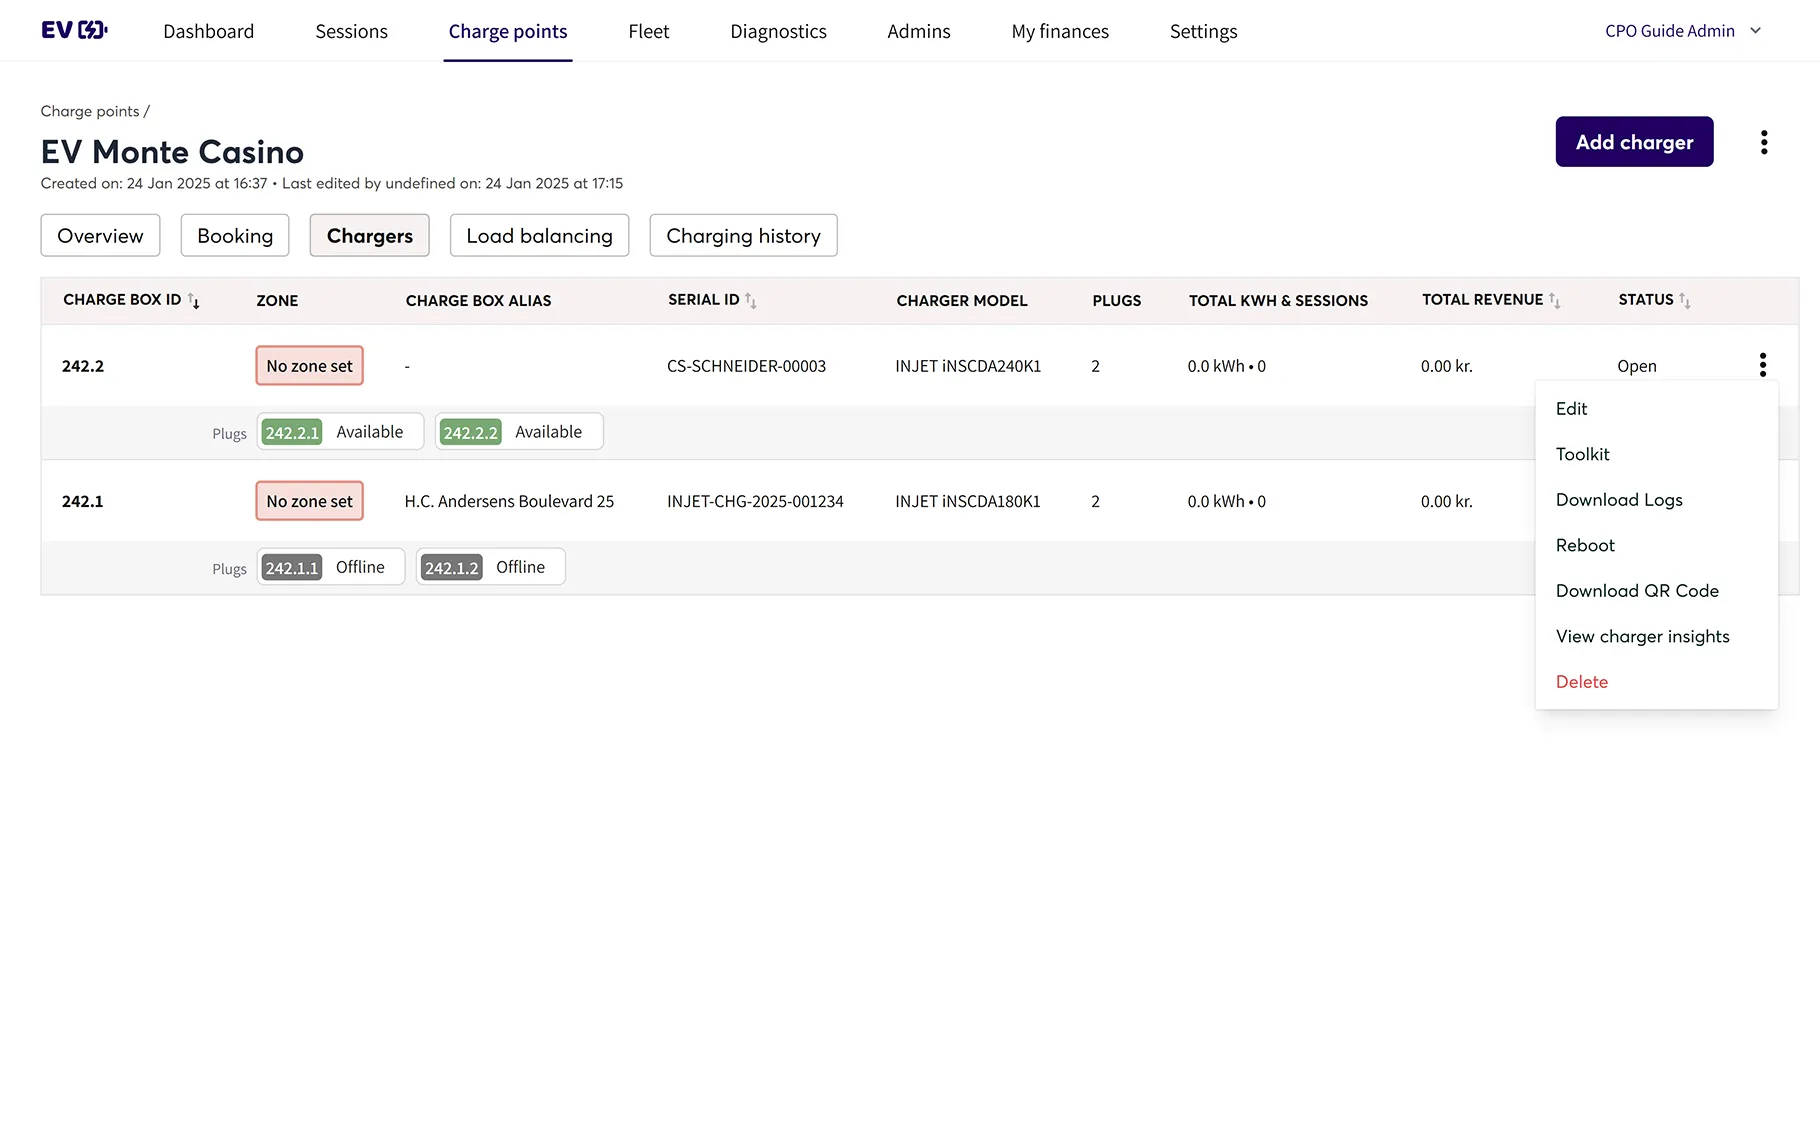
The backend creates a charge box ID with your company ID and charge box number. For example, if your company ID is 242, the first chargerbox you register will use 242.1, and the next charger will use 242.2.
Each plug has its own ID, in the example above a charger will have the following designations: 242.2.1 and 242.2.2.
The last digits are to distinguish the charger plugs so both parties (you and the user) are able to separate the session between plugs.
You can click on the three-dotted menu on the right to Download the QR Code for each charger plug, and stick them near the plug or on the charger.
Your customers can scan these codes to start the transaction with EOSVOLT apps.
To access your charger's settings that:
- Turn on your EV charger.
- The settings panel on your charging is usually done either through a physical interface on the charger or via a web/mobile app provided by the charger manufacturer.
- Refer to your hardware guide for more information.
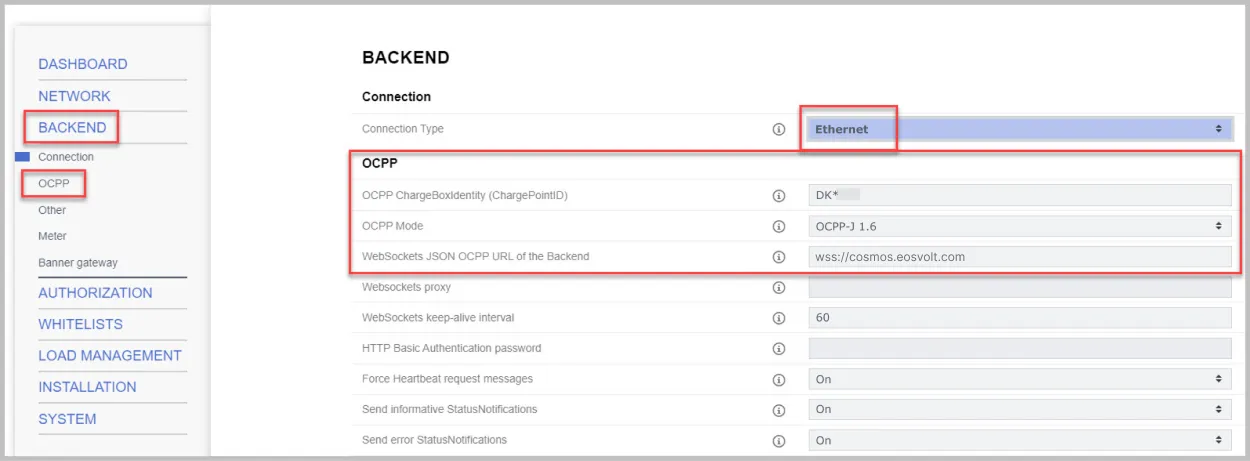
In the settings menu, navigate to the section labeled 'OCPP Configuration', 'Network Settings', or something similar.
Note that these settings may be nested under other tabs such as “Backend” or “Advanced.”
Depending on your network environment and charger capabilities, enter the ws:// or wss:// link.
- Always try to connect via the secure, encrypted wss connection: wss://cosmos.eosvolt.com/
- You may also connect via an unencrypted connection (not recommended): ws://cosmos.eosvolt.com/
- After entering the link, save your settings.
- Be sure to perform a test to ensure the charger’s successful backend connection.
- This could be a simple status check in the Spark backend (as shown on the above screenshot) or a test transaction using EOSVOLT apps.
Don't hesitate to contact us, if you encounter any issues or need assistance.
These steps allow you to connect your EV charger to our backend system using the OCPP protocol.
This enables remote management of your charger – including: monitoring, control, and firmware updates.